 Skip to content

Acrylic thickness often gets treated like a small technical detail. Just a number on a drawing. Just a quick note in a quotation. Just one more box to tick before production moves on.
I do not see it that way at all.
I have watched perfectly good acrylic projects become awkward because of one thickness choice that nobody slowed down to question. A display that should have looked light and refined ended up feeling heavy. A box that should have been cost-efficient became overpriced. A panel that looked fine in a sample photo started bending once real products were placed on it. The strange part is that none of those jobs looked risky at the beginning.
That is exactly why this topic matters to me.
Most thickness mistakes do not come from laziness. They come from good intentions. A buyer wants to avoid complaints. A designer wants the structure to feel safe. A supplier wants to reduce the chance of failure. So somebody leans toward thicker acrylic because it feels like the safer road. On the surface, that sounds sensible. In real projects, that instinct can quietly create a different set of problems.
Acrylic thickness is not only about strength. It is also about span, support, load, appearance, fabrication, shipping, and how the final product feels in real use. One extra millimeter can look harmless on paper, but it can change cost, edge appearance, weight, processing difficulty, and even the way customers judge quality.
This is where I have learned to be careful. I do not judge thickness by how reassuring it sounds in a discussion. I judge it by what the part actually has to do after it leaves the factory.
That small shift in thinking has saved a lot of trouble for me.
And once I started looking at acrylic thickness this way, I began to notice how often people confuse more material with better judgment.
Why Acrylic Thickness Is Often Misunderstood

The funny part is this: acrylic thickness looks easy from far away. A buyer sees a sample, touches the edge, and thinks the answer should be obvious. A designer copies a spec from an old drawing and moves on. A supplier gets only partial information and fills the gap with a “safe” guess.
Then trouble starts.
The misunderstanding does not come from the material alone. It comes from the way people think about risk, appearance, and performance.
One of the first things I learned in custom acrylic work is that many thickness decisions are not engineering decisions at all. They are comfort decisions dressed up as technical choices.
The “Thicker Is Always Better” Myth
This idea sounds reasonable at first. Thick feels solid. Thick feels expensive. Thick feels durable. If I place a 10mm acrylic sample next to a 3mm sample, most people react before they think. They hold the thicker one and trust it more.
I understand that reaction. I really do.
But I have seen that instinct send projects in the wrong direction. Thicker acrylic can mean more stiffness in some cases, yes. But it can also mean more weight, more processing cost, more polishing work, more shipping expense, and a clumsier final look. A display can become harder to move. A box can feel visually heavy. A component can start looking overbuilt for no real reason.
Strength is not the same as suitability.
A countertop display does not need the same logic as an acrylic furniture leg. A sign holder does not need the same thickness as a protective machine cover. A cosmetic organizer does not need to be treated like a structural part just because both are made of acrylic.
I get cautious when a buyer asks for a thicker sheet before defining what the acrylic is actually doing, because that usually means the material is being used to calm uncertainty, not solve a real design need.
Here is how I think about the myth:
| Belief | What it sounds like | What I ask instead |
|---|---|---|
| Thicker is stronger | “Let’s make it safer” | Safer against what kind of force? |
| Thicker looks better | “It feels more premium” | Premium for which product and user? |
| Thicker lasts longer | “It should avoid complaints” | Complaints from scratches, bending, or bad fit? |
| Thicker is low risk | “We do not want problems later” | Does thickness reduce the real failure mode? |
The real mistake is not liking thicker acrylic. The real mistake is treating thickness like a shortcut for good judgment.
Lack of Application Context
This is where I see many otherwise smart decisions break apart.
Acrylic thickness does not live alone. It lives inside a use case. If I do not know the load, the span, the support method, the location, and the way people interact with the part, I do not really know what thickness means.
A panel can be 5mm and perform beautifully in one design, then fail badly in another design with the same size. Why? Because support changed. Because the load moved. Because someone leaned on it. Because the fixing points were too far apart. Because outdoor heat changed the stress. Because the product went from “display only” to “customer touch every day.”
Those details matter more than many people expect.
I have seen buyers copy specs from an old project because the product looked similar. That is a very human mistake. It saves time. It feels efficient. But acrylic is full of traps like that. A similar shape does not mean a similar job. Two boxes can look almost the same and still need different thicknesses because one holds brochures and one holds a heavy skincare bottle set.
Here are some context questions I think matter before choosing thickness:
- What is the acrylic part holding or protecting?
- Is the load constant or changing?
- Is the panel supported on all sides or only some sides?
- Will users lift it, lean on it, push it, or clean it often?
- Is the product going indoors or outdoors?
- Is appearance more important than raw stiffness?
- Is the acrylic bonded, slotted, screwed, or framed?
That list may sound basic. It is basic. That is exactly why it gets skipped so often.
Miscommunication Between Designers and Suppliers
I have seen excellent designers send drawings that still leave the most important question unanswered: what will this part actually experience in use?
That is not because the designer is weak. It is because design files often show geometry much better than behavior.
A supplier may get dimensions, cutouts, and material notes, but not the actual load. Or the drawing may show a display stand, but not mention that customers will pick it up by the top edge ten times a day. Or the buyer may send a photo and say, “Please make this in acrylic,” without sharing how the piece failed before.
Then everybody starts guessing.
And guessing is expensive.
I think visual samples can also mislead teams. A sample often answers one thing well: how it looks right now. But it may not answer how it bends, how it ages, how it handles point pressure, or how it behaves in shipping.
A sample is useful. It is just not a substitute for engineering logic.
Here is a table that shows where communication often breaks:
| Missing information | What happens next | Typical result |
|---|---|---|
| Load not defined | Supplier adds extra thickness “just in case” | Cost goes up |
| Support method not clear | Stiffness gets judged wrongly | Bending risk remains |
| Use environment not shared | Wrong safety margin | Overbuild or underbuild |
| User behavior not discussed | Real-world abuse ignored | Complaints after launch |
| Only a photo is provided | Geometry copied without function logic | Poor fit for actual use |
Acrylic thickness gets misunderstood very early, often before production even starts. That is why I always slow the conversation down here.
Because if the foundation is fuzzy, the thickness choice will also be fuzzy.
And once that happens, the next question becomes much more important: what should we actually be looking at instead?
What Actually Determines the Right Acrylic Thickness

I do not like choosing thickness by instinct. I like choosing it by pressure, support, use, and risk.
That sounds less romantic. It is. But it is also how I avoid expensive mistakes.
When I look at an acrylic part, I do not start by asking, “What thickness looks good on the drawing?” I start by asking what the sheet needs to do, how it is being held, what kind of force it sees, and what kind of failure would actually matter. That gives me a much better answer.
Load and Weight Requirements
Not all load is the same. This sounds obvious, but it gets ignored all the time.
Acrylic reacts differently to a steady load than to repeated movement. A display shelf that holds the same products every day is one thing. A panel that gets pushed, grabbed, or bumped is another thing. A flat cover with light distributed weight behaves differently from a small area carrying concentrated pressure.
That is why I separate load into simple categories first.
Static vs Dynamic Load
Static load means the force stays mostly still. Think of a brochure holder, a simple riser, or a panel with a fixed item on top. Dynamic load means movement, impact, or repeated handling. Think of a retail fixture that gets touched all day, or a cover that is opened and closed often.
Dynamic load usually deserves more caution, not because the force is always larger, but because repetition exposes weakness faster.
Point Load vs Distributed Load
Acrylic dislikes concentrated stress more than many buyers think. A shelf holding ten bottles spread across the surface may perform fine. The same shelf holding one heavy object in the middle can sag or crack much sooner.
This is one of the first details I check when I review a display drawing, because even a “small” product can create a bad stress pattern if its weight sits in one tight area.
Here is a simple way I frame it:
| Load type | Example | What it means for thickness |
|---|---|---|
| Static + distributed | Brochures across a full tray | Lower risk of local stress |
| Static + point load | One heavy product on a small foot | Higher local stress |
| Dynamic + distributed | Repeated handling of a larger panel | Fatigue and flex matter more |
| Dynamic + point load | Repeated push on one small area | Highest risk zone |
The sheet does not care what the product cost. The sheet only cares how force enters it.
Span and Support Structure
This is where many thickness mistakes are born.
Acrylic can look strong in your hand and still bend badly once the unsupported span grows. A long, flat piece without support changes the whole story. The same thickness that feels fine at 150mm wide can look weak at 500mm or 800mm if there is no frame, lip, bracket, or edge support helping it.
I have seen people blame “bad material” when the real issue was poor support logic.
Acrylic thickness is never only about thickness. It is also about what holds the acrylic where it matters.
Unsupported Length and Bending
A long shelf, top panel, or cover will flex more than many teams expect. Even if it does not break, visible flex can still feel cheap. That matters in premium retail work. It matters in furniture. It matters in any product where the user reads stiffness as quality.
That is why I do not ask only whether the part can survive. I also ask whether it will feel wrong in use.
A sheet can technically pass and still disappoint.
Frames, Brackets, and Reinforcements
Sometimes increasing thickness is the wrong fix. A better structure can do more with less material. A support rib, metal frame, bent return edge, bonded side wall, or tighter bracket spacing can improve performance without turning the whole design into a heavy block.
I often prefer that route because it keeps the product smarter and cleaner.
Here is a useful comparison:
| Design approach | What it does | Trade-off |
|---|---|---|
| Increase thickness only | Adds stiffness and weight | Higher cost, harder fabrication |
| Add support frame | Controls span better | More parts, more assembly |
| Add bent return edge | Increases stiffness efficiently | Design must allow bending |
| Add bonded side support | Helps with load transfer | Bonding quality becomes critical |
The wrong question is, “Should I just make it thicker?”
The better question is, “Can I control the force path more intelligently?”
Application Type
This part matters because acrylic can play many roles. It can display. It can separate. It can protect. It can decorate. It can support. It can create a premium edge effect. Each role changes how I think about thickness.
A thin sign insert is not judged the same way as an acrylic side panel on a small furniture piece. A dust cover is not judged the same way as a freestanding tray. A cosmetic tester stand needs a different balance than a brochure holder or a machine guard panel.
I usually divide application type like this:
Display Use
- Shelf talkers
- Sign holders
- Risers
- Counter displays
These often need a balance of stiffness, appearance, and cost.
Structural Use
- Furniture parts
- Load-bearing platforms
- Larger freestanding units
These need more attention to deflection, joint strength, and support.
Protective Use
- Covers
- Guards
- Shields
- Enclosures
These depend more on impact, fixing method, and user contact.
Decorative Use
- Blocks
- Trim pieces
- Brand elements
- Floating visual parts
These often care more about edge quality, clarity, and proportions.
I have learned not to trust a thickness recommendation until I know which role the acrylic is playing, because “acrylic product” is far too broad to be useful on its own.
Safety and Impact Considerations
This area makes people nervous, and I understand why. No one wants a part to crack in use. No one wants a customer complaint tied to a material choice. No one wants to be the person who approved a thin panel that later failed.
But safety also gets misunderstood when people think only in extremes.
Acrylic does not need to be perfectly rigid in every case. Some flex is acceptable. Sometimes even normal. The real question is whether the part is staying within a safe and acceptable range for the job.
That means I look at two separate issues:
- Breakage risk
- Acceptable movement
Those are not the same thing.
A panel might not break, but if it flexes enough to look cheap or unstable, the design has still failed in a practical sense. On the other hand, a slight amount of flex in a low-load sign holder may be completely fine.
I get more cautious when edges are exposed, when the part is frequently handled, when users may hit or drop it, or when the acrylic becomes part of a public-facing safety barrier. That is when thickness may need to rise, or the material choice itself may need another look.
Here is a quick check table I use mentally:
| Risk factor | Why it matters | My reaction |
|---|---|---|
| Frequent handling | Repeated stress builds up | Add margin or improve support |
| Public use | User behavior is unpredictable | Avoid thin, fragile feeling parts |
| Sharp corners with stress | Crack risk rises | Review geometry and thickness together |
| Large unsupported panel | Visible flex or failure | Add support before only adding bulk |
| Premium display use | Flex can hurt perception | Balance stiffness with visual elegance |
At this stage, I do not try to sound brave by choosing the thinnest option. I also do not try to sound safe by choosing the thickest one. I try to choose the option that matches the real job with the least wasted material.
That sounds simple.
It is not always easy.
And that is why it helps to look at thickness ranges in a more grounded way, not as random numbers, but as practical tools with clear limits.
Common Thickness Ranges and Their Real Uses

Thickness numbers can feel abstract until they are tied to real jobs. That is why I prefer to talk about acrylic thickness in ranges, not in isolated millimeters floating in space.
A 2mm sheet means very little by itself. A 2mm sheet used for a menu holder? That makes sense. A 2mm sheet used for a freestanding tray carrying skincare jars? Very different story.
I have found that buyers become much more confident when they stop asking, “What is the best acrylic thickness?” and start asking, “What thickness is normal for this kind of use, and where does that range begin to fail?”
That is a much healthier question.
Thin Sheets (1mm–3mm)
Thin acrylic has a clear place in the market. I use it when the job is light, visual, and not asking the sheet to behave like a structural part.
This range often works well for:
- Sign inserts
- Photo frames
- Light covers
- Small printed panels
- Protective face layers
- Lightweight packaging-style pieces
The big advantage is obvious. Thin acrylic is lighter, cheaper, easier to ship, and easier to fit into many compact designs. It can look clean and precise when the geometry is simple and the support is good.
But thin acrylic also reaches its limit quickly.
It does not like long unsupported spans. It does not forgive rough handling. It can bow, flex, or feel weak if the part gets larger or the load becomes less predictable.
I do not judge thin acrylic by touching a small sample in my hand. I judge it by imagining the worst normal behavior from the end user, because that is usually where false confidence gets exposed.
Thin Sheet Summary
| Thickness | Common uses | Strengths | Limits |
|---|---|---|---|
| 1mm | Inserts, overlays, covers | Very light, low cost | Low rigidity |
| 2mm | Small signs, frame panels | Good for visual parts | Easy to flex |
| 3mm | Sign holders, light-duty displays | Better balance | Still weak for larger spans |
Medium Thickness (4mm–8mm)
This is where a lot of commercial acrylic products live.
I see this range used for:
- Retail countertop displays
- Acrylic boxes
- Cosmetic organizers
- Brochure holders
- Small risers
- Product stands
- Protective covers with moderate stiffness needs
This range often gives the best balance between cost, usability, stiffness, and fabrication freedom. It is thick enough to feel serious in many retail applications, but not so thick that the product starts becoming heavy, bulky, or overpriced without reason.
A lot of B2B custom work sits right here.
That said, even inside this range, the difference matters. A 4mm display and an 8mm display may both “work,” but they do not feel the same, cost the same, or process the same. One may feel light and elegant. The other may feel more premium and stable, or just too heavy depending on the design.
Medium Range Breakdown
| Thickness | Common uses | What I like about it | Watch-outs |
|---|---|---|---|
| 4mm | Display walls, light trays | Good entry point for many displays | Can flex on longer spans |
| 5mm | Boxes, organizers, panels | Nice visual balance | Not enough for heavy load by itself |
| 6mm | Higher-end displays, covers | Better stiffness | More weight and machining time |
| 8mm | Premium stands, stronger components | Solid feel | Cost rises fast |
This is often the zone where smart design saves more money than thicker material. Support details matter a lot here.
Thick Panels (10mm–20mm+)
Now we are in a very different category.
Thick acrylic panels often appear in:
- Premium display blocks
- Furniture parts
- Heavy-duty risers
- Structural-looking features
- Luxury brand displays
- Load-bearing panels in controlled designs
This thickness range can look beautiful. It can create that strong, polished, crystal-like presence that many premium retail brands love. It can also become excessive very quickly.
I have seen thick acrylic used well. I have also seen it used like a visual weapon, as if adding mass would automatically create value. Sometimes it does. Sometimes it only creates shipping pain and a quote that nobody enjoys reading.
The thicker the sheet gets, the more I start thinking about edge finishing, flame polishing, bonding quality, machining marks, weight handling, and transport risk. At that point, thickness is not just a performance decision. It becomes a production decision.
Thick Range Reality Check
| Thickness | Typical use | Advantage | Hidden issue |
|---|---|---|---|
| 10mm | Premium displays, stronger panels | Solid look and feel | Heavier, more expensive |
| 12mm | Blocks, luxury visual parts | Strong visual impact | Bulk can hurt elegance |
| 15mm+ | Furniture, load-heavy parts | More structural confidence | Processing complexity rises |
| 20mm+ | Specialty parts, statement pieces | Very strong visual presence | Cost, weight, polishing, shipping |
Quick Reference Table
I like having a table like this because it stops the conversation from becoming too emotional.
| Thickness range | Typical applications | Main benefit | Main limitation |
|---|---|---|---|
| 1mm–3mm | Signage, inserts, covers, frames | Low cost and light weight | Low rigidity |
| 4mm–8mm | Displays, boxes, organizers, covers | Best balance for many projects | Must respect span and support |
| 10mm–20mm+ | Furniture, premium displays, heavy parts | Strong feel and visual impact | High cost and fabrication burden |
Acrylic thickness becomes much easier to judge when I stop treating numbers like status symbols and start treating them like tools.
That mindset matters even more once money enters the room.
Because thickness mistakes rarely stay technical for long. They almost always turn into cost problems.
The Cost Trap: When Thickness Becomes Waste
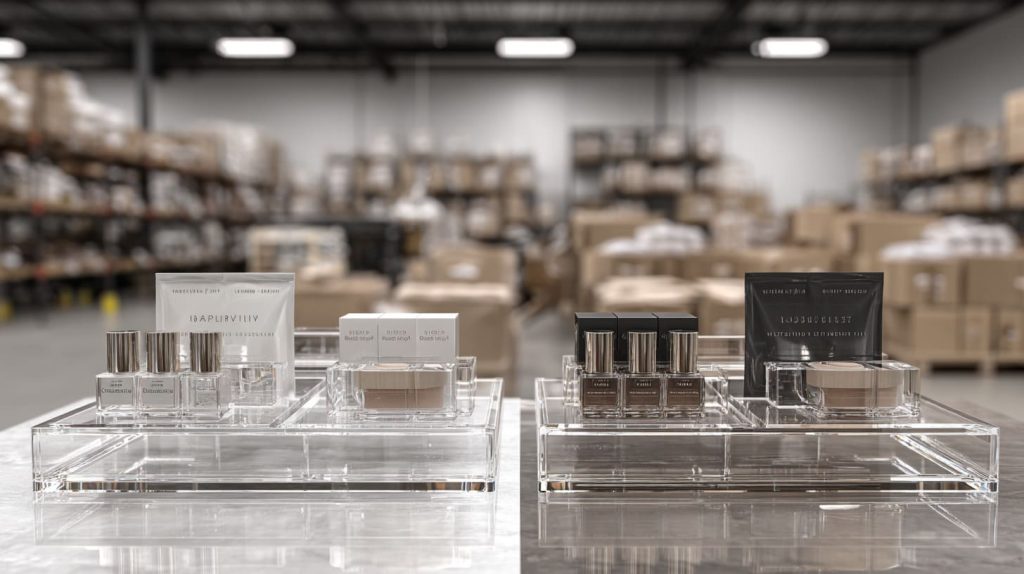
Acrylic thickness mistakes hurt the budget in a quiet way.
The quote still looks clean. The product still looks possible. No red alarm goes off. But the cost starts swelling in the background. More material. More weight. More polishing. More shipping. More machine time. Sometimes more packaging too.
And the hard part is this: people often accept that extra cost because it came from a decision that felt safe.
I have seen buyers fight hard over a small unit price difference, then approve unnecessary thickness without seeing that this one choice moved the total project cost much more.
Material Cost vs Real Value
Acrylic is not priced like a casual sketch line. Thickness changes material consumption fast. When sheet thickness goes up, the weight goes up too. That change hits the raw material cost first, but it does not stop there.
A thicker part may not deliver twice the real value, even if it uses much more material.
That is the trap.
I have worked on projects where the buyer wanted a heavier feel because they thought customers would read that as better quality. Sometimes that instinct was right. Sometimes the end product only became harder to handle and harder to justify. A premium look is not the same as a premium result.
I get skeptical when extra thickness is added without a clear failure mode in mind, because that is often where the budget starts paying for fear rather than function.
Where Material Waste Usually Starts
- Using thick acrylic to hide weak structure
- Copying a premium look from another product without checking the same need
- Adding margin repeatedly at each review stage
- Treating all acrylic parts in one assembly the same way
- Forgetting that a “small” thickness increase can affect every unit in volume
Here is a useful cost-thinking table:
| Thickness choice | Why people choose it | What can go wrong |
|---|---|---|
| Slightly thicker “just in case” | Emotional safety | Cost creep across all units |
| Much thicker for premium feel | Visual confidence | Product becomes bulky |
| Same thickness everywhere | Simplifies quoting | Some parts become overbuilt |
| Copy from older project | Saves time | New use case does not match old logic |
Processing and Shipping Impact
This is where thickness gets even more expensive.
A thicker acrylic part is not only more material. It is also more work.
Cutting can take longer. Machining can become slower. Polishing thick clear edges demands more care. Bonding thicker sections can need better process control to keep the finish clean. Packaging becomes heavier. Shipping becomes more expensive. Handling becomes less friendly.
I have seen projects where the raw material increase was only part of the problem. The real pain showed up later in production and freight.
Thickness Can Raise Cost in These Hidden Ways
| Area | What changes when thickness rises |
|---|---|
| Machining | More cutting and milling time |
| Polishing | More labor for good edge finish |
| Bonding | More care needed for clean assembly |
| Packaging | Heavier parts need stronger protection |
| Shipping | Weight and carton volume can rise |
| Installation | Bigger parts may be harder to place |
One thing I learned early is that acrylic products do not travel as numbers. They travel as real objects. When thickness increases, the factory feels it, the warehouse feels it, and the freight invoice definitely feels it.
Case Example
A project from years ago stayed with me because it looked so simple at the start.
The product was a countertop display for packaged beauty items. The buyer wanted the structure to feel strong, because the brand image was clean and premium. The first idea used a thicker panel set across almost the whole display. On paper, that made sense. In a meeting, it also felt impressive. The sample looked “solid.”
But once I reviewed the design more carefully, the logic started wobbling. The load was not actually severe. The side panels and tray walls were already doing a lot of the structural work. The thick front panel was mostly adding mass, not meaningful support.
So I suggested a reduction in thickness on selected parts while keeping support where it really mattered. We did not make the whole product thinner in a careless way. We changed the design on purpose.
Here is what shifted:
| Part | Original idea | Revised idea | Result |
|---|---|---|---|
| Front panel | Overbuilt thick panel | Reduced thickness | Better balance |
| Side support | Standard | Kept stable | Structure stayed reliable |
| Tray design | Basic | Slightly optimized | Load stayed controlled |
| Overall unit | Heavy visual feel | Cleaner and lighter | Better look and lower cost |
The display still looked premium. It still worked. It also became easier to fabricate and more reasonable to ship.
That project reminded me of something I still believe: waste does not always come from bad materials. It often comes from good materials used with lazy logic.
And once thickness starts affecting cost, it almost always starts affecting design freedom too.
How Thickness Affects Fabrication and Design Freedom

This part does not get enough attention.
Acrylic thickness is not only a performance issue. It also changes what the factory can do cleanly, quickly, and beautifully. It changes edge treatment. It changes bending options. It changes bonding behavior. It changes how refined the final product feels.
I have seen buyers focus so hard on strength that they forget thickness also shapes the design language of the product.
Sometimes a thicker part feels premium. Sometimes it feels like the design lost its discipline.
Cutting, Bending, and Bonding Limitations
Every thickness range creates its own manufacturing reality.
Thin acrylic is easy in some ways, but it can be more delicate to handle and more likely to warp if the process is careless. Thick acrylic looks strong, but it asks more from cutting, polishing, and bonding. So there is no “free” thickness. Every option comes with a trade.
Cutting
Laser cutting is often excellent for thinner acrylic and many clean-profile parts. But very thick acrylic may need more CNC work, or at least more care, depending on the finish and tolerance requirements.
Bending
Some designs rely on hot bending to create shelves, holders, or returns. Thickness affects how easy and clean that bend can be. Very thick material may resist the design direction or make the process less elegant.
Bonding
Clear acrylic products live and die by bonding quality. Thick sections can be bonded, of course, but the process control becomes more important. The thicker the part, the more I watch for alignment, bubble risk, glue marks, and joint appearance.
I do not only ask whether a thick design can be made. I ask whether it can still be made cleanly at volume without turning a nice concept into a production headache.
Here is a useful fabrication table:
| Fabrication step | Thin acrylic | Medium acrylic | Thick acrylic |
|---|---|---|---|
| Laser cutting | Usually easy | Often good | May become less ideal |
| CNC machining | Possible | Common | Often more important |
| Hot bending | Easier | Usually manageable | More limited |
| Bonding | Fast but delicate | Good balance | Needs tighter control |
| Polishing | Simpler edges | Moderate work | More labor and care |
Aesthetic Considerations
Acrylic is visual. I never forget that.
Many acrylic products are not judged only by whether they hold together. They are judged by how they look under store lighting, on a website, in a showroom, or in a customer’s hand. Thickness changes that visual effect in a big way.
A thin edge can look sharp, clean, and modern. A thick edge can look luxurious, stable, and bright. But too much thickness can also make a smart design feel blunt.
This is one of those areas where technical success does not guarantee visual success.
I have seen a design become less elegant simply because the acrylic edge got too heavy for the proportions of the product. That is not a strength problem. That is a design judgment problem.
Visual Trade-Off Table
| Design goal | Thickness tendency | Risk if pushed too far |
|---|---|---|
| Light and minimal look | Thinner | Can feel weak |
| Balanced premium feel | Medium | Needs good support logic |
| Strong visual mass | Thicker | Can feel bulky |
| Crystal-block effect | Much thicker | Cost and weight rise sharply |
I often remind myself that premium does not always mean more material. Sometimes premium means better proportion.
Customization Flexibility
Thickness also affects what kind of customization makes sense.
If a client wants logo engraving, special edges, complex cutouts, bonded layers, curved forms, or mixed-material assembly, thickness starts shaping the choices fast.
Thicker acrylic may support some luxury looks very well, but it may also reduce flexibility in other areas. A design that looked easy at 4mm may feel much more rigid at 12mm. Tool paths change. Bending options change. Tolerances matter more. Assembly may become slower.
I watch this closely in custom OEM work because customization often creates more complexity than buyers expect. And complexity does not always show up in the first rendering.
CNC vs Laser Thinking
| Method | Works best for | Thickness impact |
|---|---|---|
| Laser | Clean profiles, faster cutting, simpler parts | Better for thinner to moderate ranges |
| CNC | Precision shaping, thicker materials, complex edge work | More useful as thickness and part complexity rise |
So when I look at thickness, I do not only see strength. I see the production path. I see the edge finish. I see the lead time risk. I see whether the product will still feel graceful once it becomes real.
That is why I like simple rules of thumb. Not because they replace thinking, but because they stop people from making the same avoidable mistake again and again.
Practical Rules of Thumb for Choosing Thickness

I do not believe in magic formulas for acrylic thickness. Real projects are too messy for that.
But I do believe in practical rules that keep people from drifting into bad decisions too quickly. A good rule of thumb does not replace engineering. It gives the conversation a sane starting point.
That is useful, especially in B2B projects where buyers, designers, and suppliers all need to move fast without pretending that speed and accuracy are the same thing.
Simple Decision Framework
When I need a fast way to think clearly, I come back to four questions:
- What load is the acrylic carrying?
- What span is unsupported?
- How is the part supported or fixed?
- What kind of use environment will it live in?
That is my basic filter.
I do not start by asking whether 5mm or 8mm sounds better. I start by asking whether the part is decorative, protective, or load-bearing. Then I ask whether users will touch it, lean on it, move it, or clean it often. Then I ask whether the structure itself is helping the acrylic or leaving it alone to do too much work.
I trust a thinner sheet with a smart structure more than a thick sheet with lazy support, because that usually gives a better product in both cost and performance.
My Practical Thinking Flow
| Step | What I ask | Why it matters |
|---|---|---|
| 1 | What is the part doing? | Function defines the baseline |
| 2 | How much force hits it? | Load defines stress level |
| 3 | How far does it span unsupported? | Span defines bending risk |
| 4 | What support exists? | Structure can reduce thickness needs |
| 5 | How will users treat it? | Real behavior changes the margin |
| 6 | What look is required? | Appearance still matters |
Common B2B Scenarios
I find it helpful to talk in real product categories because that is how buyers actually think.
Retail Countertop Display
These displays often need a balance of stiffness, cost, appearance, and easy fabrication. Many of them live well in the medium range, but only if tray depth, support walls, and product weight are properly understood.
If bottles or jars are involved, I become more careful. Beauty products can create deceptively high local weight.
Wall-Mounted Signage
These parts may not carry much product load, but they can still fail visually if they flex, bow, or install poorly. Mounting method matters as much as thickness here.
Protective Covers
A cover may look simple, but user behavior matters a lot. Will it be removed often? Wiped daily? Pressed during maintenance? Attached with screws? Sitting near heat? Those details can move the thickness choice more than size alone.
Here is a simple scenario guide:
| Scenario | Main concern | Typical logic |
|---|---|---|
| Counter display | Load + visual quality | Medium range with support awareness |
| Wall sign | Flatness + appearance | Thickness depends on size and mounting |
| Protective cover | Handling + durability | Consider use frequency and fixing method |
| Organizer box | Bonding + wall feel | Moderate thickness often works well |
When to Consult Your Supplier
There is a point where guessing becomes expensive. That is when I think the supplier should be pulled in early, not late.
I like early supplier input when:
- The part is large
- The shape is unusual
- The load is unclear
- The product mixes acrylic with metal, wood, or hardware
- The design relies on bonded joints for strength
- The user behavior is rough or unpredictable
The reason is simple. A supplier sees the design from the factory side. That perspective can catch fabrication issues, visual proportion problems, or overbuilt sections that are not obvious in a PDF drawing.
I do not wait for a sample failure before asking for supplier feedback on custom structures, because that delay usually costs more than the conversation would have.
Good Questions to Ask a Supplier
- Is this thickness normal for this use?
- Can support features reduce material thickness?
- Will this thickness affect edge quality or lead time?
- Is laser or CNC better for this geometry?
- Are there bonding or polishing risks?
- Will shipping or packaging become harder at this thickness?
These are not glamorous questions. They are useful questions. And useful questions save real money.
Even with good rules, though, experienced buyers still make mistakes. Not silly mistakes. Very human ones.
That part matters because it is often where the last bit of waste sneaks in.
Mistakes Buyers Like Jacky Still Make (and How to Avoid Them)

I like working with experienced buyers because they ask better questions. They move faster. They usually understand trade-offs better. They do not panic at every quote revision.
But experience does not remove all mistakes. It just changes the shape of them.
In fact, experienced buyers sometimes make a very specific kind of error: they become confident enough to simplify the wrong thing.
I say that with respect, not criticism. I have done the same kind of thing in my own decisions. Once we have seen many projects, we start trusting our shortcuts. Sometimes that helps. Sometimes it blinds us.
Over-Specifying for “Safety”
This is one of the most common mistakes I still see.
An experienced buyer knows that failure is expensive. So they try to stay ahead of it. That is smart. But the move often becomes, “Let’s go a bit thicker and remove risk.”
The problem is that this only works when thickness actually addresses the real risk.
Sometimes the real risk is poor support. Sometimes it is rough handling. Sometimes it is a weak bond area. Sometimes it is shipping damage. Sometimes it is a visual issue, not a strength issue at all.
I worry when a team pays for extra thickness before identifying the true weak point, because that usually means the budget is solving anxiety faster than the design is solving reality.
How to Avoid It
- Define the likely failure mode first
- Check if support can solve the problem more efficiently
- Review whether all parts need the same thickness
- Ask whether the customer will even notice the “extra safety”
Underestimating Structural Needs
The opposite mistake also happens. A buyer wants elegance, lower cost, or a lighter look, so the thickness gets trimmed too far.
This often happens in projects that look clean in renderings. Flat panels. Sharp edges. Minimal supports. Beautiful concept. Then real gravity enters the scene.
Acrylic is honest that way. It does not care how good the rendering looked.
I have seen thin parts survive the meeting room and fail the real world because nobody truly accounted for span, repeated pressure, or the way the product would be used after installation. Even if nothing cracks, flex can still create a cheap feeling.
Signs That Structural Need Is Being Underestimated
| Warning sign | Why it matters |
|---|---|
| Long flat panel with little support | Bending risk rises fast |
| Heavy products on a slim tray | Sag and stress build up |
| Frequent public handling | Small abuse adds up |
| Minimalist design with no reinforcements | Looks clean, but asks more from the sheet |
| Bonded joints doing too much work | Joint quality becomes critical |
Ignoring Long-Term Performance
This is the quiet mistake. No dramatic failure. No loud crack. Just gradual disappointment.
Acrylic thickness should not be judged only by day-one performance. It should also be judged by what happens after use, cleaning, movement, friction, sunlight, and handling patterns start doing their slow work.
A part may feel strong enough on delivery and still become a problem later because:
- it scratches too easily in a high-contact area
- it warps under stress or heat
- it feels unstable after repeated use
- the visual quality drops faster than expected
That is why I try not to make thickness decisions in a day-one mindset. The buyer may approve the sample in a meeting. The end user will judge it months later.
I pay closer attention to long-term behavior when the product sits in retail, public, or high-touch environments, because those are the places where “technically acceptable” often turns into “commercially disappointing.”
Long-Term Thinking Table
| Short-term view | Long-term reality |
|---|---|
| “It feels strong now” | Will it still feel stable later? |
| “The sample looks good” | Will repeated cleaning hurt the appearance? |
| “The thickness seems enough” | What about user abuse and aging? |
| “We passed the first check” | Did we check normal daily use? |
Buyers like Jacky are not making beginner mistakes. They are usually making speed mistakes, assumption mistakes, or confidence mistakes. That is more subtle. It is also more common than people admit.
And that is why I keep coming back to balance, not maximums.
Because acrylic thickness is rarely won by choosing the most. It is usually won by choosing the most appropriate.
Conclusion
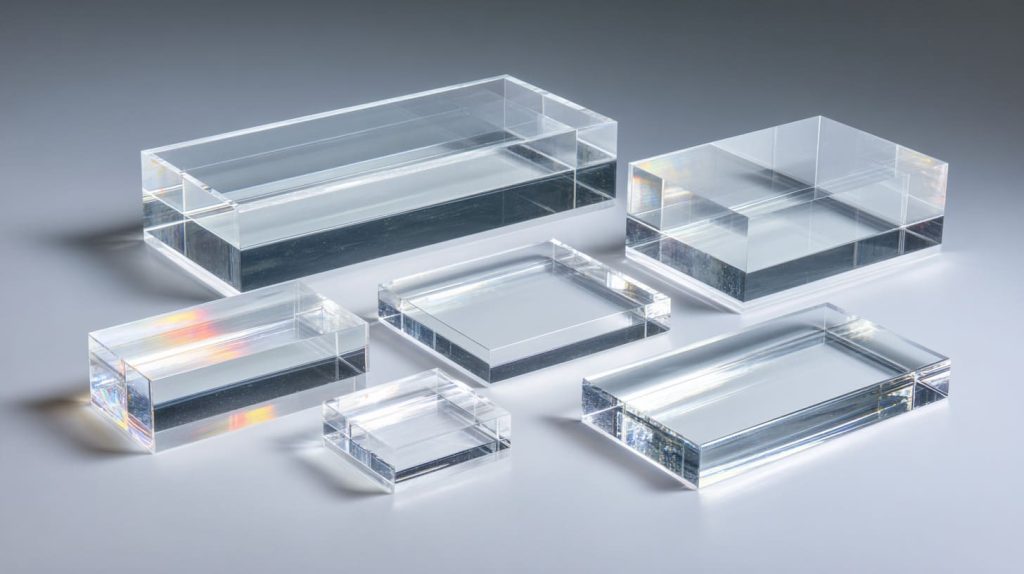
I do not believe the best acrylic thickness is the thickest one. I believe it is the one that matches the real job with the least waste and the least regret.
That is the core of my view.
I think people get thickness wrong because they often chase reassurance before they define the real use condition. They want safety, and I respect that. But in acrylic work, extra material is not the same as extra wisdom. A thicker sheet can help, but it can also hide weak thinking, raise cost, hurt proportions, and make fabrication harder than it needs to be.
That is why I judge thickness as a balance problem.
I look at load. I look at span. I look at support. I look at user behavior. I look at how the product will be cleaned, shipped, displayed, and handled. I also look at the feeling of the product, because acrylic is never only structural. It is visual. It is tactile. It tells the customer something before they ever ask what thickness it is.
The reason I think this way is simple: I have seen too many projects spend money where they did not need strength, and too many others save money in the one place where structure actually mattered. Both mistakes are avoidable.
So when I say thickness should be chosen carefully, I do not mean carefully in a fearful way. I mean carefully in an honest way. Honest about what the product does. Honest about what users do. Honest about what the factory can do well. Honest about where value really comes from.
If you are working on a custom acrylic display, box, organizer, panel, or furniture part, I think the smartest move is to stop asking, “What is the strongest thickness?” and start asking, “What is the right thickness for this exact job?”
That question leads to better products.
If you want, you can take your drawing, your product idea, or your rough spec sheet and review it with an experienced acrylic manufacturer before locking the thickness too early. That one step can save cost, improve the look, and prevent the kind of mistake that only shows up after production starts. At Feilong Acrylic, this is exactly the kind of discussion I think is worth having early.




