 Skip to content

On some projects, I notice a funny pattern. People walk straight past a beautiful product display and stop instead in front of a glowing “tunnel” of light. They lean closer, tilt their heads, and say the same thing every time: “How deep is this?”
Most people think an infinity mirror is a kind of magic trick. They say, “It must be software,” or “There is a hidden screen inside.” In reality, the idea is simple. Two mirrors, some LEDs, and careful spacing. No software. No secret moving parts. Just physics and design working together.
I like infinity mirrors because they sit right on the line between science and emotion. On the technical side, you have reflection rates, light loss, and viewing angles. On the human side, you have curiosity, surprise, and that small “wow” moment when someone forgets they are looking at a product and just looks.
For designers, buyers, and factories like ours at Feilong Acrylic, the way an infinity mirror works is not just a fun question. It affects safety, cost, shipping, cleaning, and long-term stability. If we misunderstand the principle, we end up with glare, broken illusions, or units that look cheap after three months.
From my side as a manufacturer, I do not treat an infinity mirror as “just a mirror with lights.” I treat it as a layered system where optics, structure, and user behavior all meet in one frame.
When I look at a new infinity mirror design, the thought that guides me is very simple: if the illusion cannot survive real users, cleaners, and store lighting, then it is not a good design, no matter how clever the idea looks on paper.
Before we talk about materials and factory work, I want to start with a clear picture of what an infinity mirror actually is in the eyes of the person standing in front of it.
What Is an Infinity Mirror?

At its core, an infinity mirror is a shallow box that pretends to be a deep tunnel. It uses mirrors and light to trick the eye into seeing distance where there is almost none.
How an infinity mirror looks to the human eye
When someone stands in front of an infinity mirror, they do not see parts or wiring. They see a series of light points that appear again and again into the distance.
I often hear people describe it like this:
- “It looks like a tunnel.”
- “It feels like I am looking into a hallway made of lights.”
- “It feels deeper than the wall behind it.”
Behind that feeling, there is a simple pattern. Every reflection gets a bit smaller and a bit dimmer. The brain takes that pattern and translates it into depth.
| What the viewer sees | What is really happening |
|---|---|
| Endless tunnel of lights | Many reflections between two mirrors |
| Lights get smaller and dimmer | Light loses energy on each reflection |
| Wall “disappears” behind mirror | Back mirror reflects almost all the light back |
From the outside, it looks like infinity. From the inside, it is just a controlled series of light bounces.
Common uses of infinity mirrors
I see infinity mirrors show up in three main worlds.
Retail window displays and store fixtures
Brands use them to stop people in front of the glass. A simple product can feel premium when it sits inside a tunnel of light.Art installations and exhibitions
Artists push the idea much further. They play with patterns, motion, and colored LEDs to create spaces that feel immersive, not just decorative.Home décor, furniture, and branded displays
Smaller versions appear in coffee tables, wall art, logo signs, and bar counters.
A simple way to think about the use cases is to link them to the main goal:
| Use case | Main goal | Typical size |
|---|---|---|
| Retail display | Stop foot traffic | Medium / large |
| Art installation | Create emotion | Large / room-scale |
| Home or logo décor | Add visual interest | Small / medium |
Designers sometimes focus only on visual drama. I try to link the design to the real task: stop people, tell a story, or extend a brand.
Why acrylic is often used instead of glass
Many people still imagine all mirrors as glass. In real projects, especially for retail and shipping, acrylic often makes more sense.
Acrylic gives several clear benefits:
- It is lighter than glass.
- It does not shatter in the same way.
- It is easy to cut into custom shapes.
- It can be polished, printed, or engraved.
Here is a simple comparison in the context of infinity mirrors:
| Property | Acrylic mirror / sheet | Glass mirror |
|---|---|---|
| Weight | Light, easier to handle | Heavy, harder to ship |
| Safety | Breaks without sharp shards | Can shatter dangerously |
| Custom shapes | Easy with CNC or laser | Harder, needs more processing |
| Edge finishing | Can polish to very clear edges | Polishing is slower and costly |
| Impact resistance | Good for busy public areas | More fragile |
For large installations or complex logos, acrylic is almost always my first choice, unless there is a special reason to stay with glass.
When I use the word “infinity mirror” in a meeting, my real decision is this: if the client needs scale, custom shapes, and safe handling, I quietly move the conversation toward acrylic, even if they start with glass in their mind.
Once we agree on the basic idea, the next logical step is to open up the box and look at the material stack that makes the illusion possible.
What Materials Are Used in an Infinity Mirror?

An infinity mirror looks simple on the wall. Inside the frame, there is a very specific set of layers. If we change one layer, the illusion changes.
Two-way mirror (one-way mirror)
The front layer is usually a two-way mirror, sometimes called a one-way mirror. The name confuses many people. It is not a piece of glass that behaves one way for some people and another way for others. It is just a mirror with a semi-transparent coating.
This coating reflects part of the light and lets the rest pass through.
A typical setup looks like this:
| Property | Typical value (example) |
|---|---|
| Reflection | 30–50% |
| Transmission | 50–70% |
| Position in assembly | Front, facing viewer |
From the viewer’s side, room light reflects on the surface. From inside the box, LED light passes through the front layer and returns from the back mirror. The balance between reflection and transmission is what lets the tunnel appear.
Standard mirror
At the back of the box, we usually place a standard mirror. This mirror is fully reflective on the side facing the LEDs.
Its job is simple:
- Take the light that passed through the front mirror.
- Reflect it back into the cavity.
- Send it toward the front mirror again.
Without a strong back mirror, the tunnel looks weak and shallow. With a good one, the light bounces many times before it dies out.
LED light source
Inside the frame, we place LED strips or modules around the edges, or in patterns. LEDs work well because:
- They are thin.
- They produce strong light.
- They use little power.
- They come in many colors and temperatures.
Two important choices show up in every design:
Color temperature
Warm white can feel soft and cozy. Cool white feels more technical or futuristic. RGB or addressable LEDs open up moving effects and color changes.Brightness
The LEDs must be strong enough to cut through the front mirror coating, but not so strong that they create glare or hot spots.
A simple summary:
| LED choice | Visual effect in tunnel |
|---|---|
| Warm white | Soft, calm, more “home” feeling |
| Cool white | Clean, high-tech, often for retail |
| RGB static colors | Brand-linked color moods |
| Addressable RGB | Dynamic patterns, motion, “living” tunnel |
Acrylic sheets in infinity mirror construction
In many builds, both the front and structural parts are acrylic.
We may use:
- Clear acrylic for the front with a mirror film applied.
- Mirrored acrylic for the back or sides.
- Extra layers for logos, patterns, or frames.
Thickness and edge quality change both the look and the stiffness of the structure.
| Panel role | Typical acrylic thickness (example) | Key reason |
|---|---|---|
| Small front panel | 3–4 mm | Light, enough stiffness |
| Medium wall panel | 4–6 mm | Balance between weight and strength |
| Large installation | 8–10 mm | Needed for flatness |
Edge quality matters more than many people think. Clear, polished edges catch light and can either add a nice glow or show every small defect.
When I check a material list for an infinity mirror project, I pay special attention to the front sheet and mirror specs, because the wrong combination there will turn a beautiful design into a dull, washed-out frame before we even start assembly.
Once we understand the parts on the table, we can walk through what actually happens to the light from the moment we turn the power on.
How Does an Infinity Mirror Work Step by Step?

Now that the stack of materials is clear, the process becomes easier to see. Light starts at the LEDs, enters the space, and then gets trapped in a loop between the two mirrors.
Step 1: Light emission inside the cavity
When we switch on the power, the LEDs send light into the cavity. Most strips send light sideways. The inside of the frame reflects some of this light toward the mirrors.
Key actions in this step:
- LEDs create bright points or lines of light.
- Light spreads across the cavity.
- Some light directly hits the back mirror.
- Some light hits the front two-way mirror from inside.
Step 2: Light reflection between two surfaces
As soon as light hits the back mirror, it reflects almost fully. That reflected light travels forward and strikes the inner side of the front two-way mirror.
At the front mirror:
- Part of the light reflects back into the cavity.
- Part of the light passes through and reaches the viewer.
The light that reflects back into the cavity returns to the back mirror again. This loop repeats many times.
You can think about it like this:
| Bounce number | What happens | What the viewer sees |
|---|---|---|
| 1st | Strong reflection, little loss | Bright nearest ring or dot |
| 2nd | Some loss on each mirror | Slightly dimmer, further into tunnel |
| 3rd–5th | Loss continues on every reflection | Smaller, dimmer, deeper reflections |
| 6th+ | Light becomes very weak | Faint, barely visible layers |
Step 3: Depth illusion creation
The eye sees each set of reflections as a layer. The brain knows that objects look smaller and dimmer when they are far away. So it uses the brightness and size patterns inside the mirror box to calculate distance, even though the physical depth is small.
Two design points are critical here:
Spacing between the front mirror and back mirror.
More spacing usually means a deeper-looking tunnel, up to a practical limit.Alignment of the LEDs and mirrors.
Misaligned strips or warped panels create “broken” tunnels or wavy lines.
From the outside, everything looks smooth and simple. Inside, light is bouncing around like a small, controlled storm between two surfaces.
When I walk past an assembled unit in our workshop, I do not need any tools to judge the light path; the moment I see uneven spacing between the LED strip and the mirror in the reflection, I know the final illusion will feel unstable, even if all the parts are premium.
Once we see the loop of light, the next question becomes natural: why does the mirror feel like “infinity” instead of “just a few layers”?
Why Does an Infinity Mirror Look Infinite?
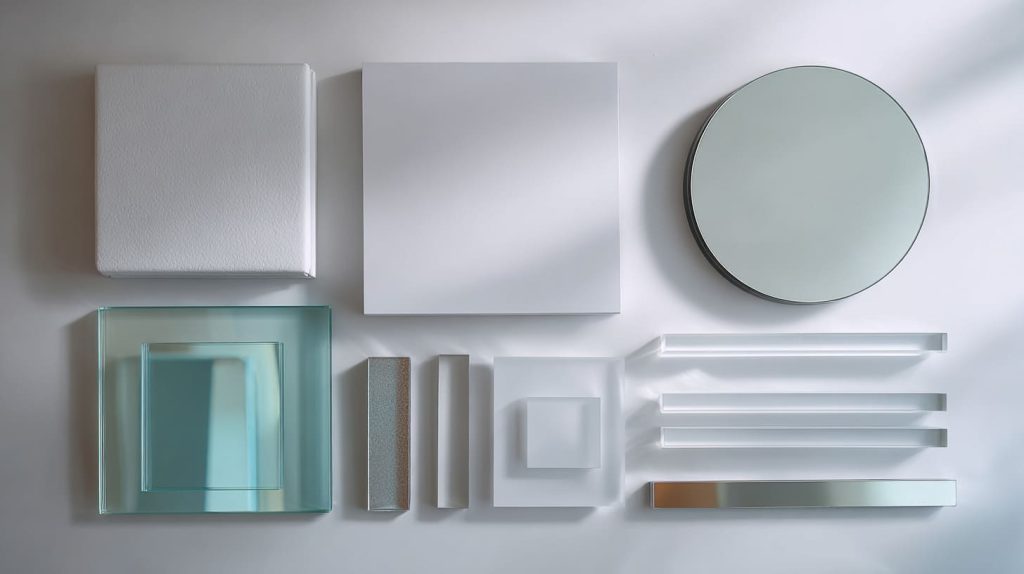
The word “infinity” sounds big and dramatic, but what we really have is a series of shrinking echoes. The magic sits in how the human brain reads these echoes.
Optical illusion and human perception
Our eyes collect light. Our brain turns that light into a story that makes sense.
In daily life, when we look down a hallway or a tunnel:
- Objects further away look smaller.
- They also look dimmer.
- Parallel lines seem to meet at a point in the distance.
In an infinity mirror, the reflections copy the same pattern.
The brain does not know that the pattern comes from two mirrors. It simply follows its usual rules: smaller + dimmer + repeated = far.
This is why even a shallow box, sometimes less than 10 cm deep, can feel like a meter-deep tunnel.
Light loss and fading effect
Each time light bounces between the two mirrors, it loses a bit of strength. The loss depends on:
- The reflection rate of the back mirror.
- The reflection and transmission rates of the front two-way mirror.
- Any absorption in the acrylic or coatings.
We can think about it in simple terms:
| Reflection step | Relative brightness (concept) |
|---|---|
| First visible layer | 100% |
| Second visible layer | ~70% |
| Third visible layer | ~50% |
| Tenth visible layer | Very low, often near zero |
The tunnel looks infinite because there is no clear “end wall” in view. Reflections fade gradually instead of stopping sharply.
Viewing angle and distance effects
The illusion is not the same from every angle.
- If the viewer stands centered and straight, they see a clean tunnel.
- If they move to the side, the tunnel may look skewed.
- If they stand too close, they may see their own face very clearly and lose some of the depth feeling.
Designers sometimes test prototypes only from one ideal position. Real users never behave like that.
When I review a sample in our factory, I like to step sideways, crouch a little, and then look from below, because that is how children and shorter customers will see it, and often that is where a weak illusion shows its flaws first.
After we understand how the illusion talks to the human eye, it becomes natural to ask what makes one infinity mirror look expensive and another look like a cheap toy.
What Affects the Quality of an Infinity Mirror?
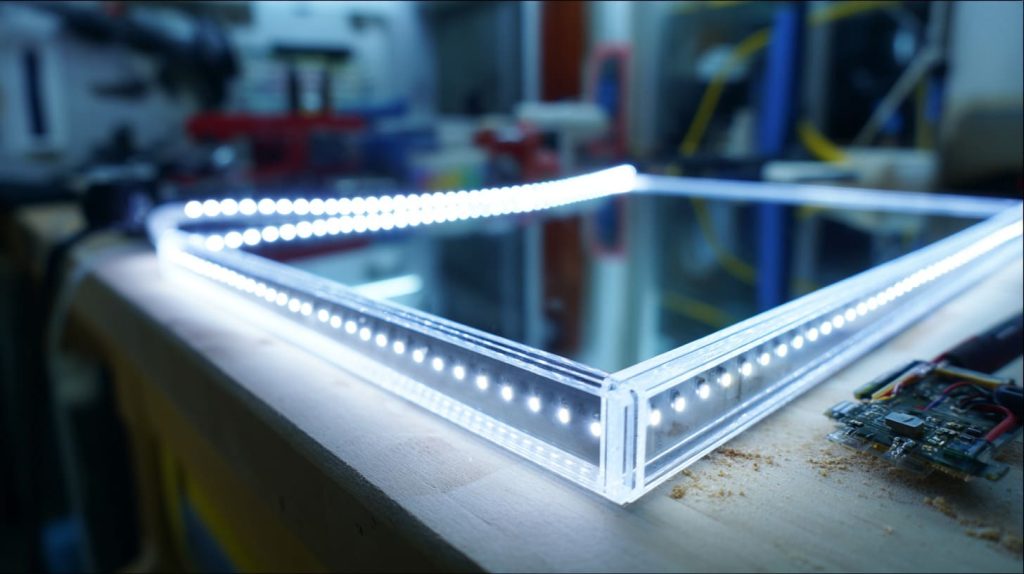
Not all infinity mirrors feel the same. Some look deep, calm, and precise. Others look noisy, shallow, or harsh. The difference usually comes from a few technical choices that stack together.
Mirror reflectivity ratio
The ratio between reflection and transmission in the front mirror changes the character of the tunnel.
- A higher reflection rate gives deeper, more defined tunnels but can make the front look too “mirror-like”.
- A higher transmission rate makes the tunnel bright but shallow.
Common setups include:
| Front mirror type | Approx. ratio (reflection/transmission) | Visual result |
|---|---|---|
| 30/70 | Brighter, shallower tunnel | Good for playful, small décor |
| 50/50 | Balanced depth and brightness | Common in retail and logo signs |
| 70/30 | Deep, strong tunnel, darker front | Better for dramatic art installations |
There is no single “best” ratio. The right choice depends on ambient lighting, viewing distance, and the mood the designer wants.
LED spacing and uniformity
LED spacing is one of the fastest ways to tell if a project was thought through.
If LEDs are:
- Too close together, the tunnel can look like a solid band with no rhythm.
- Too far apart, the tunnel looks broken or patchy.
- Uneven, the viewer feels something is “off” even if they do not know why.
A simple design guide looks like this:
| LED pitch (distance) | Typical effect |
|---|---|
| 5–10 mm | Very smooth, high-end, more cost |
| 10–20 mm | Balanced effect and cost |
| 20–30 mm | Visible gaps, more “budget” feeling |
Acrylic edge finishing
Edges sound like a detail, but they affect both the look and how the piece feels in the hand.
Common finishing methods for acrylic:
| Method | Look and feel | Notes |
|---|---|---|
| Saw-cut only | Rough, matte edges | Fine for hidden parts |
| Flame polishing | Clear, glossy edges | Fast, but can add slight distortion |
| Diamond polishing | Very clear, precise faces | Best for premium and visible edges |
Polished edges can catch LED light and create a soft glow. That can be beautiful if it matches the design, or distracting if the focus should stay inside the tunnel.
Internal depth of the mirror box
The distance between the front and back mirror changes the way the tunnel feels.
- Shallow depth: sharp, fast repetition, more “graphic”.
- Deeper depth: softer repetition, more “spatial”.
The right depth also depends on installation constraints such as wall thickness, furniture size, and wiring space.
In many B2B projects, the “quality” of an infinity mirror is not only about how deep it looks on day one; my own rule is that if the tenth reflection still looks clean and aligned under normal store lighting, then the design has real quality, not just a good first impression.
Once we understand what makes the illusion strong or weak, it becomes easier to think about different shapes and formats without losing control of the effect.
Common Design Variations of Infinity Mirrors
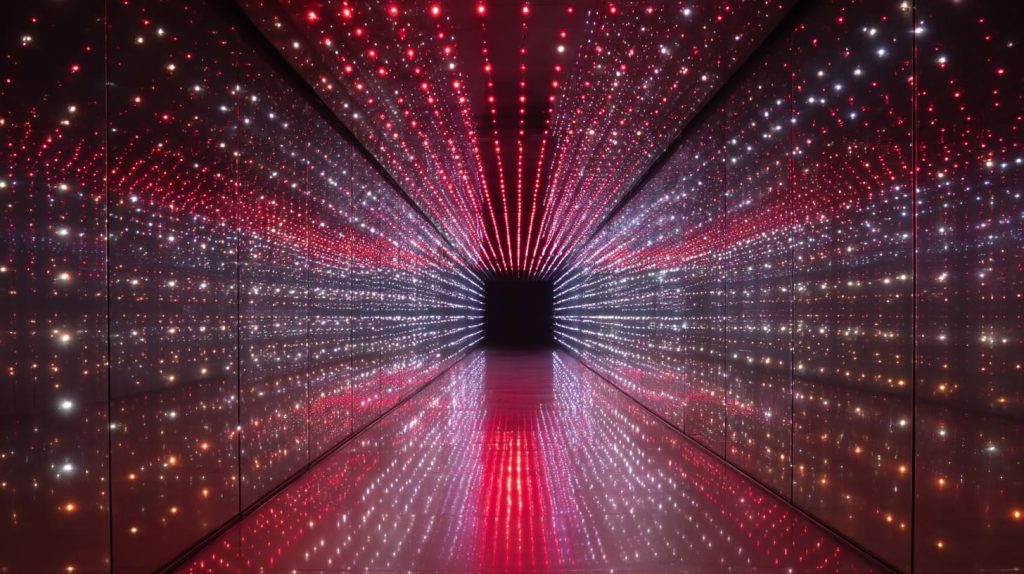
Infinity mirrors do not need to be simple rectangles. Shape strongly affects both the visual effect and the difficulty of production.
Square and rectangular infinity mirrors
These are the most common forms. They work well because:
- LED strips run easily along straight edges.
- Frames and brackets are simple to design.
- They fit naturally into walls, shelves, and furniture.
Rectangular mirrors are often used for:
- Retail wall panels.
- Bar fronts.
- Backdrops behind products.
Circular infinity mirrors
Circular designs create a softer, more organic feeling. They often appear as:
- Wall art.
- Ceiling features.
- Table inserts.
The challenges include:
- Fitting LED strips around a curve.
- Keeping brightness even along the circle.
- Holding acrylic or glass flat in a round frame.
To handle curves, we may use flexible LED strips and carefully machined rings.
Custom-shaped infinity mirrors
Custom shapes are where project designers often get excited. Logos, letters, arrows, and brand silhouettes can all use the infinity effect.
Here is how I break down the complexity:
| Shape type | Production challenge |
|---|---|
| Simple logo outline | Extra CNC or laser time |
| Thin letters | Limited space for LEDs and wiring |
| Very sharp corners | Risk of stress and crack in acrylic |
| Free-form shapes | High scrap rate and more testing |
Custom shapes work best when we respect a few limits:
- Enough internal space for LED routing.
- Reasonable edge lengths for even brightness.
- Strong mounting points so the piece survives shipping.
When a client sends me a sketch of a very complex infinity logo, the first question in my head is not “Is it beautiful?” but “How much edge length, wiring, and waste material will this shape create per unit?”, because that number quietly predicts both the difficulty of production and the stability of the light effect.
Once shapes become more creative, it is even more important to watch out for the simple mistakes that can quietly destroy the illusion.
Common Mistakes When Designing an Infinity Mirror?

Infinity mirrors fail in very repeatable ways. Many problems do not come from wild ideas but from basic choices that were rushed or ignored.
Using incorrect mirror combinations
The illusion needs a strong back mirror and a semi-transparent front mirror. When those are swapped or matched wrongly, the effect disappears.
Common wrong combinations:
| Mirror setup | Result on the wall |
|---|---|
| Two standard mirrors | Viewer only sees a normal mirror |
| Two two-way mirrors | Very weak or confusing reflections |
| Back mirror too weak | Shallow, dull tunnel |
| Front mirror too reflective | Viewer mostly sees themselves |
In drawings, these differences look small. In real life, they decide if the project goes to the showroom or straight back to the workshop.
Poor LED placement
Even good materials cannot save bad LED layout.
Problems I see often:
- LED strip starts and ends in visible positions.
- Corners have large gaps.
- Power feeds create bright or dark patches.
- Adhesive fails and some parts of the strip sag over time.
A simple placement checklist helps:
- Keep LED pitch even along all edges.
- Hide solder joints and connectors behind frames.
- Provide support points so the strip does not move with heat.
Ignoring heat management
LEDs run cooler than many old light sources, but they still produce heat. In a closed box with reflective surfaces, that heat can build up.
Risks include:
- Reduced LED life.
- Color shift over time.
- Warping or stress in acrylic parts.
Basic steps to protect the build:
- Use aluminum profiles or backing for LED strips when possible.
- Provide small ventilation paths that do not break the illusion.
- Choose LED strips that match the duty cycle and brightness needed.
The projects that fail in the field usually have one thing in common in my experience: someone decided that a small shortcut in mirror type, LED placement, or heat design “should be fine”, and that small decision turned into a visible defect that nobody can hide once the lights are on.
After talking about mistakes, the next natural question is how a factory like ours actually puts these pieces together step by step.
How Infinity Mirrors Are Manufactured in Acrylic Factories

In a place like Feilong Acrylic, the infinity mirror is not a single product. It is a workflow. Each step affects the illusion, even if the part looks simple by itself.
CNC cutting and laser cutting for precision
We usually cut acrylic parts in two main ways:
- CNC routing for thicker sheets and complex pockets.
- Laser cutting for thinner sheets and very clean edges.
The goals are:
- Accurate outer shape.
- Clean cutouts for LEDs, wiring, and mounting.
- Good repeatability from piece to piece.
Small size errors can create gaps in the frame or misalign mirrors, which the viewer will notice as crooked tunnels.
Polishing and edge finishing
After cutting, we choose a finishing method that matches the design and budget:
- For hidden frames, saw-cut edges might be enough.
- For visible front edges, we go for flame or diamond polishing.
Edge work affects both the look and the feel:
- Polished edges can glow with the LEDs.
- Rough edges can trap dust and look cloudy.
Assembly and sealing
Assembly is where many invisible choices show up.
Key actions:
- Remove protective films at the right time to avoid scratches.
- Clean inner surfaces before sealing the box.
- Place LEDs with firm adhesion and correct alignment.
- Seal gaps enough to keep dust out but allow minimal heat escape.
Infinity mirrors are very sensitive to dust. A single visible speck in the tunnel can draw the eye away from the pattern.
Quality control checks
Before we ship, we perform both visual and functional checks.
Typical checks include:
- Turn the mirror on and off several times.
- Look from different distances and angles.
- Check for dead LEDs, color shift, or dark spots.
- Inspect the outer surfaces for scratches.
We may also compare several units side by side to ensure they match.
On our production floor, the moment that tells me the most is when we light up the first sample and view it from the side under strong workshop lights, because if I can see dust, glue marks, or uneven reflections in that harsh environment, I know we must fix the process before we accept a full run for any client.
Once we know how the mirror is built, the final question for many buyers is very direct: does an infinity mirror really make sense for my B2B project?
Is an Infinity Mirror Practical for B2B Projects?

Infinity mirrors are beautiful, but beauty alone does not close a B2B order. Buyers like Jacky also think about cost, lifetime, and how many things can go wrong after installation.
Cost considerations
The main cost drivers are:
- Size and shape.
- Acrylic thickness and mirror type.
- LED type and controller complexity.
- Assembly hours and QC needs.
- Packing and shipping protection.
A simple cost view looks like this:
| Factor | Impact on cost |
|---|---|
| Larger panel size | More material, more risk |
| Thicker acrylic | Higher material and shipping cost |
| Complex shapes | More cutting time and waste |
| Addressable LEDs | Extra wiring and controllers |
| Strict QC requirements | More inspection time |
Infinity mirrors can be reasonable in price when we keep the shape simple and use LEDs in a smart way. They become premium products when shapes, controls, and sizes become complex.
Durability and maintenance
Retail and public spaces are not friendly to delicate objects. Staff clean fast. Visitors touch things. Temperature and humidity change.
Points to consider:
- Acrylic can scratch if cleaned with rough cloths or strong chemicals.
- LEDs have a long life if heat is managed, but they still age.
- Frames must handle small impacts and repeated cleaning.
We often provide simple care instructions:
- Use soft microfiber cloths.
- Avoid alcohol and aggressive cleaners.
- Do not press hard on the front surface.
Customization potential for brands
For brands, the real power of an infinity mirror is not just the tunnel itself. It is how the tunnel supports the logo, product, or story.
Options include:
- Custom shapes and letters.
- Brand colors in LEDs.
- Printed or engraved logos on the front.
- Layered panels that combine product display and infinity effect.
A basic example:
| Custom element | Brand effect |
|---|---|
| Logo outline as frame | Strong brand recall |
| Brand color LEDs | Visual link to packaging and ads |
| Animated patterns | Draws attention to a new product line |
From my point of view as a factory manager, the best B2B infinity mirror projects are not the ones with the most technical tricks; the ones that really work balance visual impact, safe maintenance, and clear brand logic so that store staff, not just designers, can live with them comfortably.
After all these layers of theory and practice, it helps to step back and ask why this illusion is worth so much effort, and what I have learned from seeing many versions succeed or fail.
Conclusion

When I strip away all the special terms, an infinity mirror is a simple idea. Two mirrors, a row of LEDs, and a small gap create a deep tunnel of light that does not really exist. The front mirror lets some light out to your eyes and sends the rest back inside. The back mirror throws that light forward again. The brain reads shrinking, fading echoes as depth and calls it infinity.
I care about how it works because the illusion is only part of the story. The other part is whether the mirror survives shipping, looks stable in real store lighting, and still feels clean after six months of cleaning and use. That part is where material choice, spacing, mirror ratios, LED layout, and factory discipline all quietly show up in the final image.
My view comes from standing between buyers like Jacky and the people on the workshop floor at Feilong Acrylic. I see drawings that look perfect on screen and I see prototypes that fail because of one small detail: a wrong mirror film, a rushed edge finish, a shortcut in heat management. Over time, I have learned that a good infinity mirror is not “a trick”. It is a small optical system that deserves the same respect as any other engineered product.
When I decide how to build one, I think like this: the illusion must be strong enough to stop someone for a second, but the structure must be simple enough for installers, cleaners, and store staff to live with every day without fear or frustration.
If you are thinking about using an infinity mirror in a display, a logo feature, or a custom acrylic project, I am always happy to talk through the trade-offs with you. We can look at size, materials, lighting, and real-world use together and decide whether infinity belongs in your design, or whether a simpler acrylic solution will serve you better in the long run.
You can always reach me through flacrylic.com to explore ideas, ask critical questions, or turn a sketch into a buildable, tested product that keeps the magic of the illusion but also respects the realities of manufacturing and use.




