 Skip to content
To hang floating shelves without drilling, use heavy-duty adhesive strips, mounting tape, or no-drill brackets. These alternative choices work best on smooth walls.
You’ll find them particularly useful on surfaces such as painted drywall or tile, often found in most U.S. Apartments and homes. Countless tenants choose these shelf options as they comply with lease restrictions and prevent wall damage.
The rest of this post features simple step-by-step instructions, safety precautions, and our top floating shelf buying guide for professional-looking results.
Why Skip Drilling for Shelves?

Going without drilling is a smart pick for folks who want to keep their space neat, save time, and dodge extra work. For the many renters and homeowners in cities such as New York, Chicago, and Berlin with inflexible lease terms, this approach is particularly beneficial. In historic buildings, boring holes is usually not allowed. Non-drilling solutions are a perfect match—particularly for consumers who value appearance, value, and easy solutions.
Keep Your Walls Hole-Free
No-drill approaches keep walls clean with no marks or unsightly holes. This is a huge victory for all those who want to preserve their home’s resale value. This is particularly useful for people living in historic districts, where the smallest modifications can make a huge difference.
Drilling can result in unsightly cracks or even strike concealed plumbing and electrical wiring, both of which come with expensive repairs. Adhesive strips and moldable glue like Sugru or Insta Morph will avoid all that danger. For those who rent, this translates into greater peace of mind about not forfeiting a security deposit or incurring a bill for repair mishap.
Perfect for Renters or Temporary Decor
Plus, if you’re a renter, skip drilling—it’s usually not allowed. Landlords appreciate walls returned to the same condition you found them. Using heavy-duty adhesive strips or mini-wall hooks, shelves can be installed and removed quickly—no spackling or repainting necessary.
These alternatives are great for anyone who enjoys a little seasonal or temporary change. Just like that, you can reposition shelves without tools or fuss.
Easier Cleanup, Less Mess
We know drilling creates dust and debris, and the cleanup involved afterwards takes time. Skip the drill and enjoy a cleaner process.
Drill-free installations eliminate the mess and make surface preparation a breeze. No expensive or borrowed power tools to set up and work with, making the process faster and more convenient. It’s a no-brainer for those lacking in jigs and patience.
What Are Command Strips Exactly?

Command Strips are plastic adhesive mounting strips designed to hang objects on walls without damaging them or leaving holes. For renters or those in shared spaces, they make a smart fix to hang shelves, art, hooks, or décor, without leaving marks or damage on the wall.
Their form factor makes them very intuitive—peel, stick, press, and you’re finished. Consumers have taken to using them for much more than just pictures as they’re so easy and clean to use.
Understanding Adhesive Technology Simply
These strips employ a robust adhesive backing that attaches to flat, nonporous surfaces. Imagine painted drywall or ceramic tiles. This sticky layer really sticks when you apply the strip and hold it down for 30 seconds or so.
The pressure keeps the two surfaces in contact and helps cure the bond, making that strong pressure essential. If your wall is textured, such as a very heavy texture or old plaster, the adhesion may not hold up.
Firstly, make sure your wall is compatible with the strip you plan on using. Next, prep the surface for optimal bond.
Different Strips for Different Weights
Different Strips for Different Weights. Others only support up to 5 pounds, while the heavy-duty versions extend up to 20 pounds or higher. The light-duty strips make great displays for lightweight shelves and picture frames, but if you’re hanging heavier items, such as floating bookshelves, go for the heavy duty version.
Make sure to read the box for weight limits. It’s important to use the correct strip for the amount of weight to prevent objects from slipping or falling.
Not Just for Pictures Anymore
Command Strips are used by people these days to hold up shelves, wall hooks, key holders, and a lot more. If nothing else, there’s definitely fun floating shelf use to display plants, small art pieces, or tech.
The secret is knowing which type of strip to use for your project, ensuring your shelf remains securely in place while looking clean and polished.
Gather Your No-Drill Shelf Gear
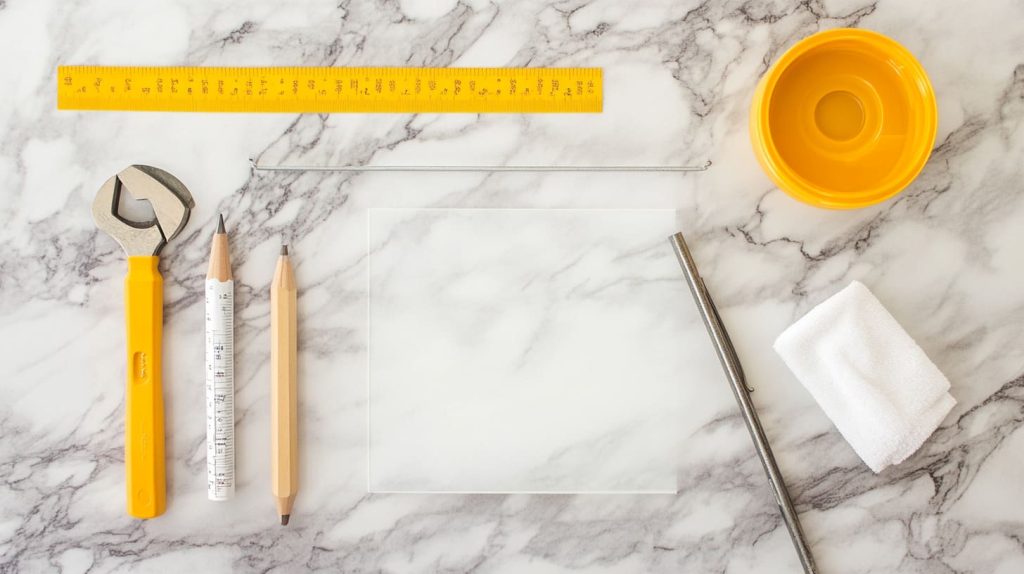
Looking forward to installing no-drill floating shelves? Getting your shelf gear in order ahead of time will make everything run smoothly and prevent errors from occurring. Get everything in place before you begin so it’s easy to find and assemble—not to mention safer.
This allows you to move fast and minimizes cleanup.
Choosing the Right Command Strips
Choosing the Right Command Strips is essential. Select strips based on the weight of your shelf and the material it’s constructed from. For smaller, lighter shelves, Command’s heavy-duty strips should do the trick, but be sure to read the limits on the package.
The type of wall also plays a role. Painted drywall, brick, and tile require special strips. User reviews provide real-life evidence of what sticks and for how long, so make sure to read those before purchasing.
If you’re using the shelf in a bathroom or kitchen, consider using water-resistant strips. Others are better suited for humid environments.
Selecting Lightweight Floating Shelves
Choose lightweight floating shelves. Stick with shelves that are 4 to 5 pounds. Plywood and MDF are great materials and more readily available at most home improvement stores.
Avoid very thick, solid wood or metal shelves—they’re just too heavy for strong adhesives. The lighter the shelf, the less likely it is that it will fall, and the less damage to the wall.
Others use backer board or plastic, supported using “O” rings or Insta Morph for custom contours.
Essential Cleaning Supplies
Clean the wall area with isopropyl alcohol and use a lint-free cloth or paper towels. Oil or dirt can cause strips to peel or not adhere.
Keep all cleaning gear readily accessible, so you don’t waste time searching for it.
Measuring Tools You’ll Need
A long level ensures shelves are perfectly flat and true. Make sure to use a tape when measuring the height of a shelf.
Pencil in your locations before you put anything up. While a caulking gun is useful, short screws or drywall plugs provide added security for heavier configurations.
Hang Shelves Without Drilling Steps

Hanging floating shelves without drilling can help keep your walls undamaged, especially in apartments or rented spaces where making holes is not allowed. Work primarily on adhesive products and tension-based systems. This way, you can hang shelves that provide the solid look of drilled-in place shelves while easily removing them.
These step-by-step instructions walk you through the process. Each layer creates a very solid and secure base for your shelf, ensuring it holds as much weight as possible. This process works best with smooth drywall and painted surfaces. You’ll be lucky to see these kinds of surfaces in most urban homes in North America and Europe.
The approaches described below use readily available materials and techniques. They are ideally suited to contemporary, pared-back interiors and to the needs of people who want tidy, versatile shelving that’s easy to move around.
1. Clean Your Wall Surface Thoroughly
- Clean Your Wall Surface Thoroughly. Begin by cleaning your selected wall area with isopropyl alcohol. This important step will clear away any dust, grease, and other residues that could compromise the bond. Allow the wall to dry completely. Wet surfaces are the top reason adhesives don’t stick.
Look at the surface with a magnifying glass for cracks, peeling paint, or texture bumps. Even tiny imperfections can compromise the strength of the strips or holders’ adhesion. Just a few more minutes will guarantee that your shelf application will be flawless! If you see any significant surface issues, move to another location.
Or you can rub the area with fine-grit sandpaper, then wipe with a damp cloth to remove dust. European renters in flats often have to contend with bad, cracked, old plaster. If the surface is not smooth, consider using a backer board or a thin plastic sheet as a base to even out the surface for better adhesion.
2. Measure and Mark Shelf Placement
Planning ahead is important for aesthetic appeal and functionality.
- Measure and Mark Shelf PlacementDecide where you want the shelf to go—how high, how wide, how far from other objects.
- Measure and Mark Shelf Placement with a pencil to outline where your Command strips or mounts are going to adhere. Don’t rush, double-check measurements before making marks. Use a small level to ensure shelves are true and straight.
This is important for overall stability and getting a nice, clean line visually. If you intend to hang several shelves, make sure to factor in the distance between each one. Additionally, consider the weight load each shelf should carry.
This step will save you from accidentally drilling through hidden pipes or electrical wires. It is important to remember this, particularly in historic buildings throughout North America and Europe.
3. Prepare the Command Strips
Command strips and other similar adhesives do their best when they are used in pairs and used as instructed. With one of your Command strips, take it in hand, carefully peel off the backing, and don’t touch the adhesive sides.
If the packaging instructions require it, pair the strips together, pushing them so they stick securely. Alignment of the strips is important—a misaligned strip can create stress points and cause unequal distribution of weight. To start, unpack all the strips.
This will guarantee that you have the right quantity and positioning for your specific size shelf before you stick them on. For small, lightweight shelves, two or three pairs of strips should do it. Lighter shelves are perpendicularly supported on a wall. Heavier shelves may require additional support or a move to tension pole techniques.
4. Apply Strips to Your Shelf
When your strips are prepared, attach them to the bottom of the shelf. To secure them, press each strip down firmly for a few seconds. Running your hand in small circles will aid in pushing out any air bubbles.
Make sure the strips are aligned evenly and spaced correctly to your wall markings. Since this step will lock the shelf’s alignment in place, be sure to go slowly. If using thin backer board or plastic as a shelf, ensure strips stick all the way across both the shelf and the surface it supports.
This should keep your shelves very stable and safe. Melt Insta Morph at 150°F to form perfectly curved nooks or other unique shapes for shelving. After you’ve molded it into the proper holders, wait about an hour for it to cool and harden before proceeding to the next step.
5. Press the Shelf Firmly against the Wall
Align your shelf with the pencil marks.
6. Press Shelf Firmly to WallUsing even pressure, push the shelf against the wall for a minimum of 30 seconds. This will heat the tape adhesive, and it will generate a strong bond. Place a level on top of the shelf while pressing to ensure it stays horizontal.
For added security, particularly if using long shelves, go through this step for every adhesive location. Begin by staging the tension pole for your floor-to-ceiling configuration. After that, place the shelf onto its brackets.
Tension poles are particularly great for anchoring heavy loads. You can use them individually or double them up, depending on the width of your shelf.
6. Wait Before Adding Weight
Adhesives require time to cure. See the guidelines on your adhesive strips or holders.
Wait Before Adding WeightTypically, you’ll want to wait at least 60 minutes before putting any heavy objects on your new shelf. Depending on the adhesive you use, it might take 24 hours for the full bond strength to develop. Resist the temptation to load it up with books or decorative objects immediately.
Don’t rush this step, or you’ll end up with shelves that crash to the ground or sag dangerously. When using Insta Morph to create custom holders, allow the custom shape to cool and harden completely.
Wait Before Adding WeightAllow at least 1 hour before placing anything on the shelf.
7. Test Shelf Stability Gently
When the curing time is complete, test the shelf stability by applying pressure downward gently. Apply pressure gently at first and look for any shifting or indication of wear.
If the shelf seems wobbly, make sure each adhesive dot is still adhered. If you are using tension pole style mounting, ensure the pole is secured tightly and has not moved out of position.
No jarring force or hard landing. For smaller shelves, you can use a single tension pole or an “O” ring. Pair this with thin shelf material to maximize its ability to hold lightweight items securely.
If you notice any issues, make changes or reapply before putting weight on the shelf.
Smart Placement and Surface Tips

Installing floating shelves without drilling requires careful planning. Selecting the appropriate placement and understanding the composition of your wall is key. North American city apartments and newer residential construction in Europe utilize drywall or plaster techniques.
These are best paired with adhesive velcro strips such as Command. You can achieve a good hold, and the paint surface is undamaged. Concrete and brick require industrial-grade adhesives. They require a heavy-duty strip, and even then, no two cases are alike.
Any wall that has protrusions or a pronounced texture will pose a challenge to the strip. The strip doesn’t grip on flat, so the shelf would end up crashing down. Watch out for wallpaper and painted areas. Some adhesives actually remove the finish as they are removed.
This is important, as shiny paint or glassy ceramic tiles will make it very difficult to ensure the strips adhere properly. Rooms that are wet or humid, such as bathrooms or kitchens with limited ventilation, degrade adhesive strips. Humidity eventually softens the glue, leaving the shelf precarious over time.
Room climate actually makes a larger impact than people realize. Large jolts in temperature, such as dramatic heat or cold, can cause an object to lose its grip. To ensure the best possible outcome, choose a location where the indoor temperature is consistent and the humidity is low.
Tip #1 – Smart Placement and Surface. Before you begin building, take inventory of what you want to place on the shelf. Limitation:s adhesive manufacturers specify load limits—usually five pounds per strip. Don’t go above this or the shelf will become unstable.
Create an even distribution of weight from end to end, not just the weight concentrated in one area. Don’t underestimate the value of small tricks, such as leveling. A flat shelf is more aesthetically pleasing, and it supports better.
For increased strength, choose two strips or more, spaced such that they correspond with the shelf’s length. Don’t leave any gaps, and inspect the shelf occasionally.
Beyond Strips: Other No-Drill Ideas
Building a home without floating shelves, you just need to know how. That’s appealing to a lot of urban renters and homeowners who don’t want to drill holes in their walls. Therein lies the convenience in learning a few no-drill shelf-mounting techniques. Each has its strengths which are unique, but all have varying degrees of user-friendliness.
Picking the proper treatment can improve not just the aesthetics but also the safety of your area.
Exploring Heavy-Duty Adhesive Tapes
Heavy-duty adhesive tapes, construction adhesive glues, etc, are effective for light to moderate loads. For more substantial shelves, attach with an interior construction adhesive. Choose tapes by weight rating—some can hold 30 pounds per strip, but read the disclaimers closely.
For starters, mount a completed acoustic panel bought at a local hardware or home decoration shop to the wall. Alternatively, you can use thicker plywood (minimum 1/2 to 3/4-inch). Get out that caulk gun and get ready to lay some glue.
Develop 1-inch blobs in a 12x12-inch grid pattern for supreme hold. Just press the panel into place and allow it to cure. If possible, use short screws with drywall plugs for additional fastening. This panel serves as a sturdy mounting surface for hanging shelves and hooks securely.
Tension Rod Shelf Systems
Tension Rod Shelf Systems Tension rods can support light- to medium-weight shelves and are most effective when braced between two stable surfaces. Measure the wall gap beforehand, then screw tension rods to size so they fit tightly.
Lay the shelf boards across the top, ensuring that all of your measurements are level. Because this system is very easy to relocate and reconfigure, it is great for renters or shared workspaces.
Freestanding Shelf Units
Freestanding Shelf Units: Freestanding shelves are not attached to the wall at all. Opt for metal, wood, or adjustable units to suit your unique space.
Put them in places they can’t fall over—stable, flat floors are ideal. These shelves provide the perfect amount of versatility, and you can choose a design to complement your space.
When Adhesive Shelves Go Wrong

Floating shelves held up with adhesive strips offer a quick, drill-free alternative. As convenient as they are, they need the utmost care and handling to work well. Defects go awry when adhesive strips fail to adhere as intended.
Humid areas, such as bathrooms, for instance, can cause adhesive strips to fail prematurely. Neglecting to wipe surfaces down with isopropyl alcohol first almost always results in weak holds. When shelves are over 10 lbs.., the adhesive strips just won’t cut it.
Furthermore, if they are more than 5 inches deep, their stability may deteriorate over time. If you don’t fully insert the adhesive strip, you can be setting yourself up for failure. Avoiding the 30-second squeeze test for each one can be problematic as well.
Even skipping the hour-long wait for the adhesive to cure can result in a shelf tumbling disaster.
Signs Your Shelf Might Fail
First, look for signs such as sagging or tilting. These are clear indicators that the shelf is not secured properly. Gaps between the back edge and the wall indicate that some strips are not adhering.
Strange creaking sounds or movement when you push down on the shelf are further signs of inferior adhesion. These warning signs appear quickly in high-traffic areas or on shelves that are overstuffed with books or other decorative items.
Quick Fixes for Loose Strips
In cases of smaller misalignments, remove the shelf and reattach, holding each strip down firmly for 30 seconds. Replace any strips that don’t stay in place.
Adding additional adhesive strips increases the coverage of weight distribution, but make sure to verify total weight does not exceed the capacity. Often, just shifting the shelf over an inch or two will reveal a sturdier patch on the wall.
Reinforcing for Extra Security
Use two or three adhesive strips to secure a shelf in place. Non-drill brackets or tension rods provide extra reinforcement in a pinch.
Routine inspection can catch minor movement before the shelf collapses.
Remove Shelves Without Wall Damage
Floating shelves are a great storage solution for renters or anyone looking to avoid the hassle of drilling. The technique you use to remove them is just as important as how you originally mounted them. Choosing the proper removal method prevents wall damage or excess adhesive residue.
Shelves that incorporate tension poles or floor-to-ceiling posts are easily removed with no wall holes to repair. Others have used custom holders created from materials such as Insta Morph. These babies are melty and moldy to do what you need, and when you’re done with them, they peel off cleanly.
Proper Command Strip Removal Technique
If you didn’t use Command Strips to hang the shelf, use caution as you remove these. Pull the tab directly down, gently and continuously, for optimal results. This pops the adhesive side loose without tearing up paint or drywall.
Don’t pull it hard or turn the strip at an angle. That action can rip the wall’s surface right off. Regardless, always check the label for the brand you purchased, as each variety will likely have special instructions.
Dealing with Stubborn Adhesive
If the adhesive hangs on, work a putty knife under the edge to pry it off. For stubborn areas, heat from a typical hairdryer can loosen the adhesive, allowing it to be easier to remove.
Remove scrap residue with isopropyl alcohol. This safely eats through sticky areas without damaging the wall.
Cleaning Up Any Residue
Complete the process by wiping the entire area with a clean, damp cloth. For stubborn stains, a mild cleaner can assist in restoring the wall to its original state.
Taking this extra step ensures that your wall is prepped for your next DIY project or move.
Conclusion

The best way to hang floating shelves without drilling is to use tools such as Command Strips or no-drill brackets. For optimal adhesion, stick to smooth, painted walls, and make sure to adhere to the weight limits or risk your shelves collapsing. Consider using wire racks with tension rods or freestanding racks in narrow spaces. So, avoid shelf fails from sloppy glue or flimsy tape with a flush, flat application. When removing shelves, pull gently and evenly to avoid wall damage. For renters or people who enjoy variety, no-drill shelves allow flexibility to switch things around. Try these no-drill tricks and save your space, looking sleek without the hassle. Looking for simpler solutions? See the guide that follows to learn more life-friendly solutions that get the job done.




