 Skip to content

Acrylic thickness gets treated like a small line on a drawing far too often.
I have seen this happen in very normal product talks. A buyer asks for a quote. A supplier gives 2 mm, 3 mm, and 5 mm options. Everyone looks at the price first. That reaction is natural. Price is easy to see. Thickness feels technical. So people move on too fast.
I do not move on that fast anymore.
I have been around enough acrylic projects to know that thickness is rarely just about material. It touches almost everything. It affects how a display holds weight. It affects whether a shelf stays flat or starts to sag. It affects whether a box survives shipping or arrives with a fine crack at the corner that nobody noticed in the factory. It even affects how the product feels in the customer’s hand. Cheap. Solid. Trustworthy. Weak. Premium. All of that can start with thickness.
I learned this in a boring way, which is usually how the most useful lessons arrive. A client once approved a nice-looking acrylic display sample because the shape was clean and the cost looked right. On the bench, it seemed fine. In shipment, it flexed. In retail use, it bowed just enough to make the whole unit feel wrong. Nothing exploded. Nothing fully collapsed. But the product had already lost value.
That is why I do not treat acrylic thickness as a simple material choice. I treat it as a decision that sits between engineering, shipping, cost, and brand feeling.
A lot of real failures do not come from “bad acrylic.” They come from the wrong thickness under the wrong load, over the wrong span, with the wrong shipping conditions. That combination causes the trouble. Not the material alone.
I tend to slow down when a drawing looks clean but the support points look too far apart, because neat drawings can still hide weak structures.
For B2B buyers like Jacky, that small mistake can turn into hidden cost very fast. One bad thickness choice can lead to returns, cracked stock, customer complaints, and a product that quietly damages the brand. That hurts more than a small sheet-cost increase ever will.
So in this article, I want to break the topic down in a practical way. I want to look at thickness through three things that matter in real work: load, span, and shipping risk. That is where most of the useful decisions live.
And once those three start interacting, the job gets more interesting.
What Factors Actually Determine Acrylic Thickness?

When people ask me how to choose acrylic thickness, I do not start with a chart. I start with questions.
What will this part carry? How far does it span without support? How rough will shipping be? Those three questions tell me more than a generic thickness recommendation ever can. A lot of buyers want a fast answer. I understand that. But fast answers often become expensive answers later.
I get a little cautious when someone asks for “the standard thickness,” because there is no honest standard without context.
Load: Static vs Dynamic Forces
Load sounds simple at first. Something sits on the acrylic. The acrylic holds it. Done. But real life is not that polite.
Acrylic parts deal with two kinds of force most of the time:
| Force Type | What It Means | Typical Example | Risk Level |
|---|---|---|---|
| Static load | Constant weight over time | Products sitting on a display shelf | Medium |
| Dynamic load | Sudden or moving force | Handling, bumps, drops, vibration | High |
| Concentrated load | Force on a small area | Heavy item resting on one small foot | High |
| Distributed load | Force spread over a wider area | Evenly placed products across a panel | Lower |
A static load is the easy one to picture. A shelf holds cosmetics, brochures, or packaged goods. The weight stays there. The force is constant. That still matters because acrylic can slowly deform under long-term stress.
Dynamic load is where people get surprised. A product gets placed down a little hard. A display gets bumped during restocking. A packed unit vibrates in a truck for two days. A carton gets dropped at a warehouse. That force is short, but it can be harsher.
I have seen designs that were technically strong enough for store use but still failed because the team only judged the display in a calm sample room. Real logistics are not calm.
A small increase in weight does not always create a small increase in bending. That is one of the traps here. Deflection can rise faster than people expect, especially when the span is long. So a design that feels “almost okay” can become clearly wrong with a minor increase in load.
Span: The Hidden Amplifier
If load is what pushes down, span is what gives that force room to do damage.
Unsupported span means the distance between support points. It is the gap where the acrylic has to hold itself up. That gap is often the quiet problem in a design. Buyers notice thickness. Engineers notice dimensions. But the unsupported distance between supports? That gets missed all the time.
Here is the simple truth: longer span means much more bending risk.
Even thin acrylic can perform well over a short span. The same sheet can feel weak and unreliable over a longer distance. That change can happen fast. A shelf that looks acceptable at 120 mm span may feel completely different at 350 mm span.
| Span Range | Structural Effect | Common Result |
|---|---|---|
| Short span | Lower bending stress | Thin acrylic may work well |
| Medium span | Deflection becomes visible | Needs thicker sheet or support |
| Long span | High bending and creep risk | Redesign often needed |
This is why I do not like thickness decisions made from sheet thickness alone. I want to know the geometry. Geometry tells the truth faster than hopeful thinking does.
Shipping Risk: The Most Ignored Variable
Shipping risk is the part many teams leave until the end. I think that is backwards.
Acrylic parts do not travel inside perfect drawings. They travel in cartons, on pallets, through trucks, in containers, under stacking pressure, in weather changes, and in the hands of people who may not care what is inside the box. That reality changes the thickness decision.
Three shipping stresses matter a lot:
- Vibration
- Stacking pressure
- Drop or impact events
Acrylic can survive factory inspection and still fail in transit because transit creates repeated micro-stress. The part flexes a little. Then a little more. Then one weak corner or edge gives up. That is why a “safe” design in the workshop can become a problem after export shipping.
I have learned to distrust any thickness recommendation that does not include packaging and transit conditions, because shipping is often where elegant samples become ugly lessons.
That leads to the next question, and it is the one buyers usually ask first anyway: how much does load itself change the thickness choice?
How Does Load Affect Acrylic Thickness Selection?

Load is one of those things people think they understand until they see a shelf bend in slow motion over three months.
I do not just ask how heavy the product is. I ask how the weight sits, how often the part gets handled, and whether the load stays there all day. That tells me much more than a single kilogram number.
Light Load Applications (≤2–3 kg)
Light-load acrylic applications are everywhere. Cosmetic displays, brochure holders, leaflet stands, product sign holders, countertop organizers. These products often look easy. And sometimes they are. But “light load” does not mean “no risk.”
For short spans, 2–3 mm acrylic can work well in many of these cases. It keeps cost down. It looks clean. It is easy to machine and assemble. But the span has to stay reasonable, and the loading needs to be fairly even.
| Application | Typical Load | Common Thickness Range | Notes |
|---|---|---|---|
| Brochure holder | Low | 2–3 mm | Good for short, supported panels |
| Cosmetic riser | Low | 3 mm | Better if users touch it often |
| Small countertop tray | Low | 2–3 mm | Watch corner stress |
| Price sign holder | Very low | 2 mm | Usually okay with small size |
What I notice in light-load work is that user behavior matters more than people expect. A brochure holder does not just “hold brochures.” People grab from it. Staff refill it. Someone knocks it sideways. Someone presses on the edge. So I do not like going too thin just because the listed product weight looks harmless.
A 2 mm part may survive the load chart and still feel flimsy in a customer’s hand. That matters. In retail display work, perception is part of performance.
Medium Load Applications (3–10 kg)
This is where thickness choices start getting more serious.
Retail shelves, medium product stands, organizers with multiple items, and broader display panels often fall in this range. Here, 3–5 mm acrylic becomes more common, and support design starts to matter a lot more.
| Application | Typical Load | Common Thickness Range | Helpful Add-ons |
|---|---|---|---|
| Retail shelf | 3–8 kg | 4–5 mm | Front lip, rib, side support |
| Product stand | 3–6 kg | 3–5 mm | Base reinforcement |
| Multi-item organizer | 4–10 kg | 4–5 mm | Bonded dividers help |
| Display riser set | 3–5 kg | 3–4 mm | Works better with compact span |
This is where I often see false confidence. The acrylic looks thick enough by eye, so the team relaxes. But medium loads are where long-term deformation starts showing up. A panel may not crack, but it may sag just enough to look cheap after some time. That kind of failure is quiet. It does not create drama. It creates disappointment.
I get more conservative when a medium-load part also needs to look premium at eye level, because small visible sag is enough to make the whole display feel low grade.
Heavy Load Applications (10 kg+)
Heavy-load acrylic jobs are a different conversation. At this point, I do not just ask, “How thick should the sheet be?” I ask whether acrylic alone should carry the job at all.
For loads above 10 kg, 5 mm and above may be needed, and in many cases a hybrid design is smarter. That might mean thicker base panels, bonded supports, metal inserts, or structural changes that reduce stress instead of simply adding mass.
| Application | Typical Load | Common Thickness Range | Better Approach |
|---|---|---|---|
| Heavy organizer | 10 kg+ | 5–8 mm | Add support walls |
| Large merch shelf | 10 kg+ | 6 mm+ | Use ribs or brackets |
| Stacked product unit | 12 kg+ | 6–8 mm | Reduce unsupported span |
| Display base for dense goods | 10 kg+ | 5 mm+ | Consider hybrid frame |
This is where many buyers make a costly mistake. They keep increasing thickness and assume the problem is solved. But sometimes extra thickness adds cost, weight, and polishing work without truly fixing the weak geometry.
I have had cases where a redesign with shorter span and smarter support beat a thicker sheet on both cost and reliability. That is why I never treat thickness as the only lever.
And once load starts making sense, span enters the room and changes the whole mood.
How Does Span Change Everything in Acrylic Design?

Span is the part that likes to hide.
Acrylic can look strong in a CAD file and weak in real use simply because the unsupported distance was too generous. I have seen that happen more than once. The material was fine. The machining was fine. The finish was fine. The span was the real issue.
I pay more attention to support spacing than most first-time buyers expect, because span is often the reason a “good material choice” still performs badly.
Short Span (≤150 mm)
Short spans are forgiving. That does not mean anything works, but it does mean thinner acrylic has a better chance to perform well.
When the unsupported distance is small, the acrylic panel resists bending much more effectively. That is why 2 mm or 3 mm acrylic can work in compact products like small trays, holders, and narrow shelves.
| Short Span Use Case | Thickness Often Seen | Performance Outlook |
|---|---|---|
| Small brochure pocket | 2 mm | Usually stable |
| Compact display riser | 3 mm | Good if load is light |
| Narrow divider panel | 2–3 mm | Often acceptable |
| Small cosmetic tray | 3 mm | Works well with support |
Short span is where people often get lucky. A design may be underthought, but the geometry saves it. That luck can be misleading, though. Teams start believing the same thickness will also work on larger layouts. That is when trouble starts.
Medium Span (150–400 mm)
This is the danger zone for many common acrylic products.
At medium spans, bending becomes visible. Sometimes it is only a little. But that little bend matters, especially in retail and display work where clean lines are part of the product value. A shelf that droops slightly can make the full unit look tired, even when it has not technically failed.
| Medium Span Condition | Likely Result | Usual Fix |
|---|---|---|
| Thin acrylic + light load | Mild visible flex | Increase thickness |
| Thin acrylic + medium load | Noticeable sag | Add rib or support |
| 3 mm panel + long use | Creep over time | Move to 4–5 mm |
| Wide shelf with no rib | Front edge bend | Add front lip |
This is the range where I stop trusting “it looked fine in the sample room” as a decision method. A medium span may look okay on day one and wrong by week ten.
That is why I often suggest either a thickness upgrade or a structural detail like a rib, bonded strip, or folded edge. The goal is not just surviving the first shipment. The goal is holding shape in real use.
Long Span (400 mm+)
Long spans change everything.
Once the unsupported distance gets large, acrylic becomes much more demanding. The deflection risk rises. The creep risk rises. The visual weakness becomes easier to notice. And shipping becomes harsher because a larger panel can flex more under vibration and impact.
At this stage, thickening the sheet may help, but structural redesign often becomes the real answer.
| Long Span Situation | Common Failure Mode | Better Response |
|---|---|---|
| Wide shelf | Midpoint sag | Add support or shorten span |
| Large flat panel | Vibration crack | Better packaging + reinforcement |
| Thick but unsupported panel | Long-term bowing | Change geometry |
| Large display top | Edge flex | Add frame or support wall |
When I see a long-span acrylic panel with no smart reinforcement, I usually assume I am looking at a future complaint unless the load is very light.
Long spans ask you to think like a builder, not just a buyer. And that leads straight into the next issue, because load and span are never acting alone.
How to Balance Load and Span Together?

Load and span are like two people causing trouble together. One adds force. The other gives that force room to act. If I only look at one of them, I can make the wrong call very easily.
I rarely approve a thickness idea until I see load and span on the same page, because each one changes the meaning of the other.
The Load-Span Interaction Principle
A lot of buyers think like this: if the load doubles, maybe the thickness should go up one step. That sounds reasonable. But in acrylic work, span can be more dangerous than load.
Why? Because longer unsupported distance creates leverage. That leverage makes bending grow fast. So doubling the span can hurt more than doubling the weight. That is the part people tend to miss.
Let me put it in a simpler way:
- A short shelf with medium load may be fine
- A long shelf with the same load may sag badly
- A longer shelf with only slightly more load may fail much faster than expected
This is why “we used 3 mm before” is not a useful design reason by itself. Used it where? At what width? At what support spacing? Carrying what? Packed how? Those details matter.
I tend to challenge recycled old specs when the new product layout changes even a little, because small geometry changes can destroy the logic of the old thickness.
Practical Rule of Thumb Table
I still like rule-of-thumb tables. They are useful. They just should not be treated like law.
Here is a practical starting point for many acrylic display and organizer applications:
| Load / Span | Short Span | Medium Span | Long Span |
|---|---|---|---|
| Light Load | 2 mm | 3 mm | 4–5 mm |
| Medium Load | 3 mm | 4–5 mm | 6 mm+ |
| Heavy Load | 4–5 mm | 6 mm+ | 8 mm+ / redesign |
This table is a guide, not a promise. It helps frame the conversation. It does not replace testing.
Here is how I think about it in real work:
| Situation | My First Thought |
|---|---|
| Light load, short span | Can I save cost safely here? |
| Medium load, medium span | Do I need reinforcement instead of just thickness? |
| Heavy load, long span | Should this be redesigned before quoting? |
| Premium display project | Will small sag damage the visual quality? |
Acrylic thickness decisions become much easier when I stop asking for “the right thickness” and start asking for “the right thickness for this load-span pair.”
And then shipping shows up and ruins any lazy assumption left on the table.
What Role Does Shipping Risk Play in Thickness Decisions?
Shipping risk is the part many teams treat like a packaging issue only. I do not see it that way. Shipping is also a structure issue.
Acrylic does not care whether the stress comes from store use or container travel. Stress is stress. If the panel flexes too much during shipping, the part can arrive damaged even when it was “strong enough” in the factory.
I get suspicious when a design looks acceptable on the table but has wide flat areas and weak edge protection, because those are exactly the parts shipping likes to punish.
Vibration and Fatigue During Transport
A truck ride is not just movement. It is repeated movement. Small, constant, annoying movement.
That repeated vibration creates micro-flex in acrylic. At first, nothing looks wrong. Then the weak point starts to show. Maybe it is a bonded corner. Maybe it is a narrow slot. Maybe it is a hole near an edge. Over time, those small stresses build up.
| Shipping Stress | What It Does | Common Result |
|---|---|---|
| Road vibration | Repeated tiny flex | Fine cracks over time |
| Loose packing | Allows movement | Edge wear and impact marks |
| Long transit route | Extends stress duration | Higher fatigue risk |
| Mixed pallet load | Uneven force exposure | Local stress points |
This is one reason thin acrylic sometimes fails even without obvious overload. The part did not carry too much weight. It simply kept flexing more than it should have.
Stacking Pressure in Packaging
Stacking pressure is very real, and flat panels are often the first victims.
Cartons get stacked. Pallets get loaded. Warehouses do not always treat your shipment gently. So even if each single unit is light, the total compression force on lower cartons can become serious.
| Packaging Condition | Risk to Acrylic |
|---|---|
| High carton stack | Vertical pressure on lower units |
| Weak inner support | Flat surfaces bow inward |
| Poor pad location | Stress focuses on one point |
| Large unsupported face | Compression damage becomes more likely |
I have seen panels survive machining, polishing, assembly, and final inspection, then arrive with stress marks because the packaging supported the wrong areas.
That kind of loss feels especially frustrating because the product was close to being right. Just not right enough.
Drop and Impact Scenarios
Drops are not rare. They are normal. Somebody always drops something somewhere in the chain.
The problem is that acrylic usually fails first at the edge, hole, or corner. Those areas concentrate stress. So a minor impact that would not bother another material can chip or crack acrylic fast.
| Impact Point | Typical Outcome |
|---|---|
| Corner | Crack initiation |
| Edge | Chipping or fracture |
| Hole area | Radial cracking |
| Broad flat surface | Scratches or local stress whitening |
I watch corners and cutout areas very closely in export designs, because those small details often decide whether the shipment arrives looking professional or tired.
So now the question becomes obvious: how do I design for shipping safety without simply making every part thicker and more expensive?
How to Design for Shipping Safety Without Over-Thickening?

I do not like lazy thickness increases.
Yes, thicker acrylic can reduce risk. But it also raises cost, weight, polishing time, shipping weight, and sometimes assembly difficulty. So my goal is not to make everything thick. My goal is to make the design harder to hurt.
When I review a fragile-looking acrylic part, I usually look for smarter structure first and thicker sheet second.
Smart Reinforcement Instead of Just Thickness
Acrylic gets much stronger when geometry helps it.
That can mean adding a bonded rib under a shelf. It can mean using side walls as support. It can mean folding or bending the design so the shape carries force better. It can mean adding a front lip that reduces edge flex.
| Reinforcement Method | What It Helps | Best Use Case |
|---|---|---|
| Bonded rib | Reduces sag | Shelf panels |
| Side wall support | Shortens span | Organizers and trays |
| Front lip | Stiffens front edge | Retail shelving |
| Base flange | Improves stability | Display stands |
I have seen a well-placed support strip outperform a thicker panel at lower total cost. That is why I do not assume more material is always smarter material.
Packaging as Part of Structural Design
This point gets missed a lot: packaging changes the effective structure during shipment.
If foam supports the right points, the panel spans less during transport. If the unit is held tightly, vibration drops. If the corners are protected well, impact risk falls. Good packaging can reduce structural stress in a big way.
| Packaging Choice | Structural Benefit |
|---|---|
| Foam at support points | Shorter effective span |
| Tight fit insert | Less movement and vibration |
| Corner guards | Better edge protection |
| Layer separation | Less surface scratching and load transfer |
I think packaging design deserves to sit in the same meeting as thickness selection, because shipping safety is not just a box problem.
When to Increase Thickness for Safety Margin
That said, there are times when I absolutely do increase thickness for peace of mind.
Export shipments are one. High-value products are another. Premium retail items with very low tolerance for cosmetic damage are another. In those cases, the safety margin is part of the business model.
| Situation | My Usual Direction |
|---|---|
| Local delivery, low-value item | Keep thickness efficient |
| Export shipment | Add safety margin |
| Premium cosmetic display | Prefer better feel + lower flex |
| Fragile geometry | Increase thickness if support is limited |
I become more generous with safety margin when replacement cost is higher than material savings, because the “cheap” choice stops being cheap at that point.
That same idea shows up again in buyer mistakes. And honestly, some of those mistakes happen so often that they deserve their own section.
Common Mistakes Buyers Make When Choosing Acrylic Thickness
I do not say this to criticize buyers. I say it because I have seen these mistakes enough times that they almost feel built into the process.
Acrylic projects can look simple. That is why people rush. And once people rush, the same errors keep showing up.
The mistake I watch for most is not bad intention. It is false confidence.
Focusing Only on Sheet Cost
This is the classic one.
A buyer compares 3 mm and 5 mm sheet cost and sees a clear saving. The thinner option looks attractive. On paper, it wins. But that is only the first layer of cost.
Real cost includes:
- Breakage
- Returns
- Rework
- Customer complaints
- Brand damage
- Extra packaging
- Lost confidence in the supplier
| Cost Type | Thin Sheet May Save | Thin Sheet May Cause |
|---|---|---|
| Material cost | Yes | — |
| Shipping weight | Sometimes | — |
| Returns | — | Higher risk |
| Product life | — | May drop |
| Brand perception | — | May weaken |
When I hear “we chose thinner to save cost,” I usually want to ask, “save cost where, exactly?”
Copying Existing Designs Without Context
This one happens all the time in custom work.
A team uses the same thickness from an older project and assumes it will still work. But maybe the new display is wider. Maybe the load is heavier. Maybe the support spacing changed. Maybe the shipment route is longer. The copied thickness may no longer make sense.
| Old Project | New Project | Why Copying Fails |
|---|---|---|
| Narrow shelf | Wide shelf | Span changed |
| Light products | Dense products | Load changed |
| Local shipping | Export shipping | Logistics changed |
| Compact box | Large panel display | Stress pattern changed |
I get uneasy when a spec gets reused without anyone checking how the product will actually behave this time, because familiar numbers can hide new risk.
Ignoring Long-Term Creep and Deformation
Acrylic does not always fail in a dramatic way. Sometimes it just slowly gives up its shape.
That slow bending under constant load is one of the most ignored issues in thickness decisions. A shelf may pass inspection and still bow over time. A display panel may stay intact and still look old too early. That is not a technical victory. That is a commercial loss.
| Time Frame | What Can Happen |
|---|---|
| Day 1 | Looks fine |
| Week 2 | Slight flex may appear |
| Month 2 | Visible sag in weak designs |
| Month 6+ | Permanent deformation risk rises |
That quiet kind of failure bothers me more than sudden breakage sometimes, because it makes the product feel disappointing without giving a dramatic warning.
Once those mistakes are clear, the next step is not just avoiding them. The next step is learning how good engineers actually optimize thickness.
How Do Engineers Optimize Thickness for Cost and Performance?
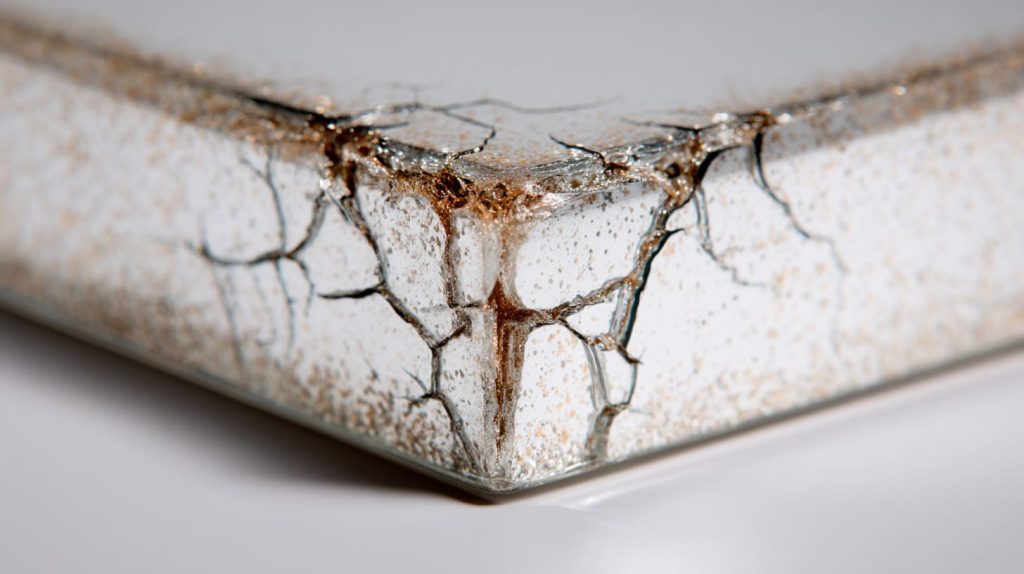
Good thickness decisions are rarely about being aggressive or conservative. They are about being honest.
I like designs that save material. I also like designs that survive real use. The real skill is finding the point where those two goals stop fighting each other.
When I review an acrylic part, I do not ask how thin I can make it. I ask how efficient I can make it without creating a future complaint.
Material Efficiency vs Structural Integrity
This is the core trade-off.
Thin acrylic saves money and reduces weight. Thick acrylic improves stiffness and often improves feel. But both sides have limits. Too thin, and the part becomes risky. Too thick, and the design may become unnecessarily expensive or heavy.
| Design Goal | Thin Material Helps | Thick Material Helps |
|---|---|---|
| Lower sheet cost | Yes | No |
| Lower weight | Yes | No |
| Better stiffness | No | Yes |
| Better premium feel | Sometimes no | Often yes |
| Easier shipping survival | No | Yes |
I try to avoid designs that are “just barely acceptable,” because barely acceptable has a bad habit of becoming unacceptable after shipping, restocking, and repeated use.
Combining Thickness with Design Features
This is where better engineering usually wins.
Instead of using thickness alone, engineers often combine it with smart features:
- Bonded supports
- Edge lips
- Side panels
- Interlocking slots
- Better load distribution
- Base widening
Those details can transform performance.
| Design Feature | Why It Works |
|---|---|
| Bonded rib | Increases stiffness with less extra material |
| Slot structure | Shares load across the design |
| Wider base | Reduces tipping and stress concentration |
| Side support panel | Shortens unsupported distance |
| Front lip | Improves edge rigidity |
I trust designs more when the geometry is helping the sheet, because acrylic performs best when it is not asked to do all the work alone.
Testing and Prototyping Before Mass Production
This part sounds obvious, but it still gets skipped too often.
A quick prototype can answer questions that long email threads cannot. Put the load on it. Leave it standing. Shake the packaged sample. Drop test the carton. Stack it. Watch what happens. The acrylic will tell the truth.
| Test Type | What It Reveals |
|---|---|
| Load test | Immediate bending risk |
| Long-term standing test | Creep and sag behavior |
| Drop test | Corner and edge weakness |
| Shipping simulation | Vibration-related issues |
| Packaging compression test | Stacking risk |
I feel much better about a thickness decision after seeing a sample misbehave once, because failed prototypes are cheaper than failed shipments.
And beyond cost and strength, there is another layer buyers should not ignore: what the thickness communicates.
How Does Thickness Affect Perceived Quality and Branding?
This part is easy to dismiss if you only think like an engineer. But buyers do not live in engineering alone. End users do not either.
Acrylic thickness changes how a product feels, looks, and gets judged. That judgment happens fast. Faster than most data sheets. Someone touches the edge. Someone sees the panel from the side. Someone notices whether it flexes when lifted. In a few seconds, the product tells a story.
I often use touch and visual feel as a final check, because customers judge with their hands and eyes long before they judge with logic.
Tactile Feel and Customer Perception
A thicker acrylic part often feels more stable and more premium. That does not mean every product should be thick, but it does mean thickness has emotional value.
A thin piece may be functionally enough. Still, if it feels weak, the customer may assume the whole product is low quality.
| Thickness Feel | Customer Reaction |
|---|---|
| Too thin | Cheap, fragile, temporary |
| Balanced | Clean, practical, reliable |
| Thick and stable | Premium, confident, durable |
I have seen two products with similar function get very different reactions just because one felt firmer in the hand.
Visual Distortion and Edge Finish
Thickness also changes the visual experience.
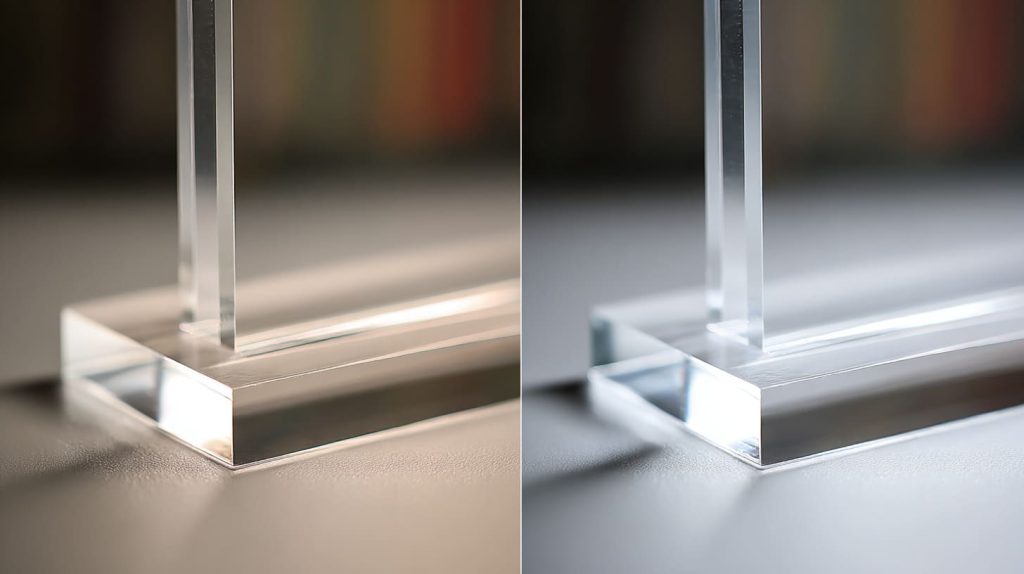
Thicker acrylic can create stronger polished edges and more visual depth. It can also change how light moves through the material. In some products, that feels rich and high value. In others, it may feel too heavy. So the right answer depends on the brand and the use.
| Visual Element | Thickness Effect |
|---|---|
| Edge appearance | Thicker edges look bolder |
| Light refraction | More visible in thicker sheet |
| Clarity impression | Can feel more substantial |
| Finish quality | Polished thick edges may look premium |
I pay close attention to edge presentation on premium displays, because customers often read polish and thickness as proof of care.
Brand Positioning: Cheap vs Premium Signals
Thickness sends a signal even when nobody says a word.
A budget display can use efficient thickness and still look respectable if the design is smart. A premium brand display often needs a stronger feel and more visual weight. So thickness becomes part of brand language.
| Brand Positioning | Thickness Direction |
|---|---|
| Low-cost promo display | Lean but safe |
| Standard retail fixture | Balanced practical thickness |
| Premium cosmetic display | More solid feel preferred |
| High-end branded organizer | Strong visual and tactile confidence |
I do not think thickness should be chosen by engineering alone, because product value is not judged by engineering alone.
That is really where the whole topic comes together for me.
Conclusion

I do not choose acrylic thickness by asking one simple question anymore. I used to think the job could be handled with a quick material choice and a familiar number from an older project. Real work corrected that idea for me.
Now I look at thickness as a business decision hiding inside a technical drawing.
Load matters. Span matters. Shipping risk matters. And none of them should be judged alone. A sheet that looks fine under one condition can become the wrong choice the moment the span grows, the load shifts, or the product starts a long export trip. That is why I keep coming back to the same basic habit: I slow down before I approve thickness.
I do this because I have seen how small thickness mistakes create big, annoying costs. Not dramatic costs all the time. Quiet costs. A shelf that sags and makes the display feel cheap. A corner crack that appears after shipping. A premium-looking product that loses trust the first time someone touches it. Those problems are expensive in a way that does not always show up in the first quote.
What pushes my view is simple. I have watched smart buyers save a little on sheet cost and lose much more in rework, complaints, and weak product feeling. I have also seen good projects become much stronger just because someone asked better questions early. How heavy is the load? How wide is the unsupported span? What will shipping actually do to this part? Those questions are not glamorous. But they save real money.
I also believe strongly that thicker is not always better. Smart design is often better. Better support, better geometry, better packaging, better testing. Those choices can outperform a lazy thickness increase. That is why I often prefer the design that thinks harder, not just the design that adds material.
If you are choosing acrylic thickness for a new display, box, organizer, or retail fixture, I think the safest move is this: do not ask for the thinnest sheet that might survive. Ask for the most reliable choice for the full job.
That is the standard I trust.
And if you are working on a custom acrylic project now and want a second set of eyes on the load, span, structure, or shipping risk, you can reach out to us at Feilong Acrylic. I would rather help check the design early than watch you pay for the wrong thickness later.




