 Skip to content
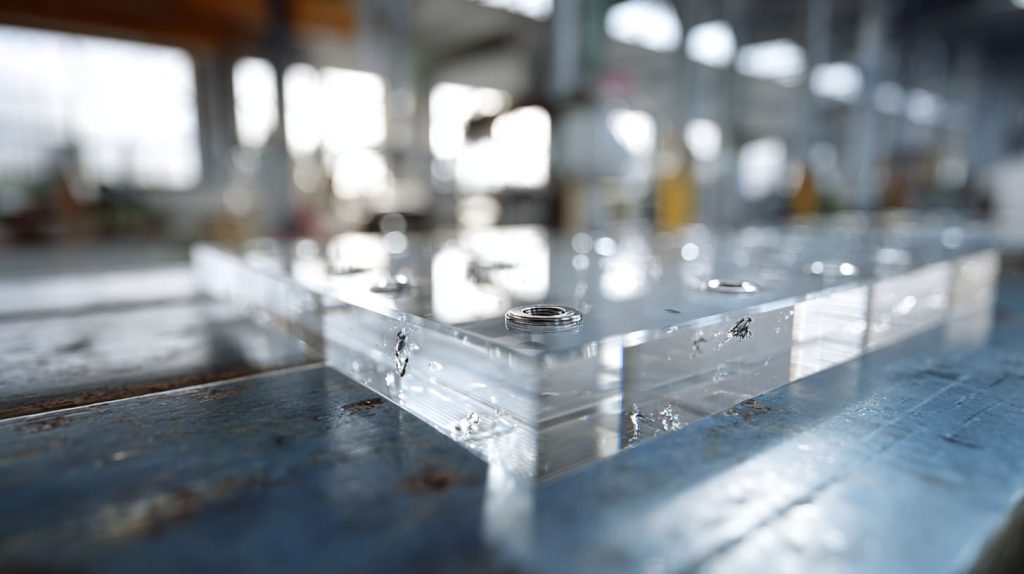
Acrylic has one annoying habit.
It can look beautiful on day one.
Clear edges. Clean shape. Smooth surface. Nice packaging. The buyer opens the carton, checks the parts, and everything feels fine.
Then three weeks later, an email comes.
“Some pieces started cracking.”
That sentence is small, but I know the weight behind it. For a B2B buyer, this is not just a material issue. It can become a project delay, a customer complaint, a replacement cost, and sometimes a quiet loss of trust between buyer and supplier.
I have seen this many times in custom acrylic work. A laser-cut acrylic display, acrylic panel, acrylic box part, or custom stand can pass the first visual inspection. It may even survive the shipment. But after sitting in a warehouse, being cleaned, assembled, or mounted, thin cracks start to appear around the edges, holes, corners, or glued areas.
The first reaction is usually simple.
“It must be shipping damage.”
I understand that thought. Shipping is easy to blame because the parts traveled a long way. They moved from factory to truck, from truck to port, from port to container, from container to another warehouse. Anything can happen.
But delayed cracking is often more complicated.
Many cracks do not start during shipping. They start earlier. They may begin during laser cutting, material selection, polishing, bonding, drilling, packaging, or even design drawing review.
The problem is like a small stone inside a shoe. At first, it does not hurt much. But after walking for a while, you feel it.
For acrylic products, that “small stone” is often stress.
It hides inside the sheet. It hides along the laser-cut edge. It hides around a screw hole. It waits quietly. Then heat, pressure, alcohol cleaner, vibration, or tight assembly gives it a push.
And then the crack appears.
For buyers like Jacky, who already know Chinese factories and custom acrylic projects, the question is not only “Who is responsible?”
The better question is:
Where did the stress come from, and how can we stop it before the next order?
That is how I usually look at this issue. I do not like to judge a cracking problem only by the final photo. I want to trace the chain backward. Material. Cutting. Design. Cleaning. Assembly. Packaging. Every step leaves a clue.
So let’s take this problem apart in a practical way.
Not from a textbook.
From the factory floor.
What Causes Laser-Cut Acrylic to Crack Weeks Later?
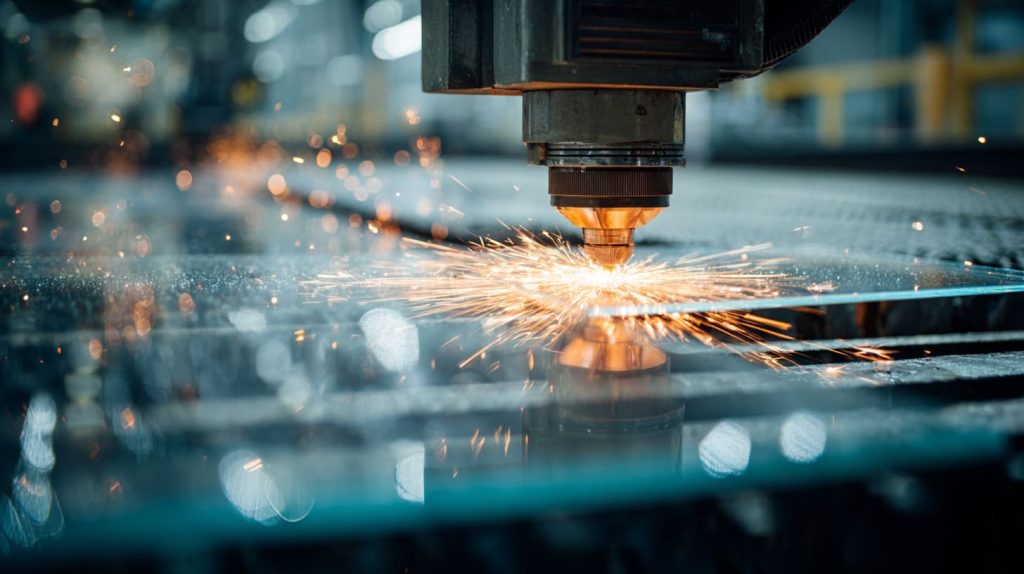
Laser cutting is clean, fast, and beautiful. That is why many acrylic products use it.
But laser cutting also uses heat.
And acrylic does not always forgive heat.
When the laser beam passes through acrylic, it melts and vaporizes the material along the cutting line. The edge becomes glossy. The shape becomes accurate. The part looks finished.
But under that pretty edge, stress may already be sitting there like a quiet troublemaker.
The detail I pay attention to first is not whether the laser edge looks shiny. I care more about whether the part design, sheet type, and laser settings create stress that the product cannot release later.
A shiny edge can fool people.
A stable edge is harder to produce.
Internal stress created during laser cutting
Laser cutting creates heat near the cut edge. If the cutting power is too high, the speed is too slow, or the sheet is sensitive, the edge can become over-heated.
This does not always create an instant crack. That is the tricky part.
The part may look fine after cutting. It may look fine after cleaning. It may even look fine after packing.
But the acrylic edge has already changed.
| Laser cutting factor | What can happen | Why it may crack later |
|---|---|---|
| Too much power | Edge becomes over-heated | Heat stress stays near the cut line |
| Too slow cutting speed | Material burns or melts too much | Edge becomes brittle |
| Poor focus setting | Cutting is uneven | Stress concentrates in weak areas |
| Thin sheet cutting | Sheet bends more easily | Small stress becomes visible faster |
| Complex shapes | Many corners and curves | Stress has more places to gather |
Acrylic is not metal. It does not behave like aluminum or steel.
When metal has some stress, it may bend or deform first. Acrylic often gives less warning. It can stay clear and rigid for days, then suddenly show small lines like dry river cracks.
I once saw a batch of small acrylic display parts. The customer said the first sample looked perfect. The mass production parts also passed inspection. But after the parts were assembled with small screws, cracks appeared around the laser-cut slots.
The real issue was not only the screws.
The laser-cut slots had sharp internal corners. The parts were thin. The screws added pressure. The stress had nowhere to go.
The crack was not a surprise. It was just late.
Material quality problems
Material choice is another quiet reason.
Many people say “acrylic” as if it is one simple material. But in real production, acrylic sheets can be very different.
Cast acrylic and extruded acrylic do not always behave the same during laser cutting. Cast acrylic is often more stable for many custom display and fabrication projects. Extruded acrylic can be more cost-effective, but it may carry more internal stress from the manufacturing process.
This does not mean extruded acrylic is always bad.
It means the application must match the material.
| Material issue | Common result | Risk level for delayed cracking |
|---|---|---|
| Cast acrylic, good quality | Better cutting and machining stability | Lower |
| Extruded acrylic | More internal stress in some cases | Medium to high |
| Recycled or mixed-grade sheet | Inconsistent behavior | High |
| Poor sheet density control | Uneven cutting response | Medium |
| Hidden impurities | Weak points inside sheet | Medium to high |
Low-grade acrylic can be dangerous because it may still look clear at first.
A buyer may hold the sample and think, “This is okay.”
But clarity is only one part of quality.
For custom acrylic items, I also care about:
- How the sheet reacts to laser heat
- Whether the thickness is consistent
- Whether the sheet bends too easily
- Whether the edge chips during drilling
- Whether the material shows stress marks after cleaning
A clear sheet is not always a reliable sheet.
That line sounds simple, but it saves money.
Chemical exposure after production
Chemical exposure is one of the most underestimated causes of cracking.
Acrylic hates some chemicals.
Alcohol cleaner, strong solvents, certain adhesives, some printing chemicals, and even packaging materials can trigger stress cracking. The worst part is that the crack may appear later, not immediately.
It is like pouring hot water into a glass with a tiny hidden flaw. The glass does not fail because of the water alone. It fails because the flaw was already there.
For acrylic, chemical exposure often becomes the final push.
| Chemical or exposure | Possible effect on acrylic | Where cracks often appear |
|---|---|---|
| Alcohol cleaner | Stress cracking | Edges, holes, glued areas |
| Solvent-based adhesive | Local material attack | Bonding lines |
| Strong cleaning liquid | Surface crazing | Visible front surfaces |
| UV exposure | Long-term weakening | Outdoor-facing areas |
| Temperature change | Expansion and contraction | Corners and screw holes |
Many buyers clean acrylic parts after receiving them. That is normal.
But if a part already has internal stress from laser cutting, an alcohol wipe can expose the problem. The buyer may think the cleaner caused the crack. The factory may think the buyer damaged the product.
Both sides may be partly right.
The cleaner may not be the root cause.
It may be the trigger.
Structural design mistakes
Design can make acrylic strong.
Design can also make acrylic fragile.
Some designs look elegant in a drawing, but they are dangerous in production.
Sharp inside corners are one example. They look clean in CAD. They also create stress concentration. When pressure builds, the crack often starts from that corner.
Holes placed too close to the edge are another common problem. Acrylic needs enough material around the hole. If the hole is too close, the screw pressure can split the part.
Tight assembly tolerance is also risky. If acrylic must be forced into a metal frame, acrylic may hold the stress for a while. Then it cracks later.
| Design feature | Why it looks attractive | Hidden risk |
|---|---|---|
| Sharp inside corner | Clean and precise look | Stress gathers at the corner |
| Hole near edge | Saves space | Edge can split |
| Very thin wall | Light and elegant | Weak under pressure |
| Tight slot fit | Feels accurate | Creates constant pressure |
| Acrylic-metal assembly | Strong mixed structure | Different expansion behavior |
This is where I often slow down before production. A drawing can be correct by size but wrong by behavior. If the acrylic part must live under pressure, vibration, cleaning, or temperature change, I do not judge the drawing only by dimensions.
I judge how the part will suffer in real life.
That sounds a bit dramatic.
But acrylic does suffer.
And it remembers.
A crack that appears weeks later is usually not one single mistake. It is often a chain. Heat stress. Material stress. Design stress. Cleaning stress. Assembly stress.
One small thing may not break the part.
Five small things together can.
The next question is more interesting: why does the part wait so long before it complains?
Why Do Cracks Often Appear Weeks After Shipment?

Delayed cracking is confusing because people expect defects to show up immediately.
A broken corner is easy to understand.
A scratched surface is easy to see.
But a delayed crack feels unfair. The product passed inspection. The shipment arrived. The buyer stored it. Then the problem appeared later.
So both sides may feel frustrated.
The factory says, “It was fine when we shipped it.”
The buyer says, “It cracked before we even used it.”
Both statements can be true.
The part was fine visually.
But it was not stress-free.
Stress continues building after production
Acrylic can hold stress inside itself.
Laser cutting, bending, drilling, polishing, gluing, and tight packing can all add stress. Sometimes that stress does not create a visible crack at once. It slowly works through the material.
I like to think of it like a wooden shelf holding too much weight.
The shelf may not break on the first day. It may not break in the first week. But every day, the load is still there.
Acrylic behaves in a similar way when stress stays inside the part.
| Production step | Stress source | Delayed result |
|---|---|---|
| Laser cutting | Heat along edge | Small edge cracks |
| Drilling | Pressure around hole | Radial cracks |
| Polishing | Heat and friction | Fine surface crazing |
| Bonding | Solvent or rigid joint | Cracks near glue line |
| Tight packing | Constant pressure | Warping or edge splits |
Transportation vibration can also help cracks grow.
A carton may not be crushed. The parts may not be visibly damaged. But repeated small vibration can make a weak point worse.
This is why I do not only ask, “Was the carton damaged?”
I also ask:
- Were the parts packed too tightly?
- Were protective films still on both sides?
- Were parts rubbing against each other?
- Was there pressure on one corner?
- Were panels stacked flat or standing under stress?
A clean carton does not always mean stress-free shipping.
Environmental changes after delivery
Acrylic reacts to environment.
Temperature change matters. Humidity can matter. Storage pressure can matter. A part shipped from southern China to Canada may experience very different conditions after leaving the factory.
Acrylic expands and contracts with temperature. If the design has no allowance, the material may fight against itself.
Cold makes acrylic more brittle. Heat can increase movement. Dry air can make some surface stress more visible. Warehouse stacking can add pressure.
| Environmental condition | Possible effect | Common crack location |
|---|---|---|
| Cold warehouse | Acrylic becomes less forgiving | Edges and corners |
| Hot container | Material expands | Tight-fitting parts |
| Dry indoor air | Surface stress appears | Polished or cut edges |
| Heavy stacking | Constant pressure | Bottom panels |
| Sunlight exposure | Heat and UV effect | Front-facing parts |
Acrylic is not weak in normal use.
But acrylic needs respect.
If a part has hidden stress, environment can expose it.
A buyer may receive parts in winter. The parts may sit in a cold warehouse. Then workers bring them into a warm room and assemble them quickly. That quick temperature change can make already-stressed parts crack.
The material did not suddenly become bad.
The full stress story finally became visible.
Assembly at the customer side
Assembly is another common reason cracks appear later.
This is a sensitive topic because buyers do not like to hear that assembly may be part of the issue. I understand that. A buyer paid for good parts. The buyer expects the product to survive normal assembly.
But normal assembly must match acrylic behavior.
Over-tightened screws are one of the biggest problems. Acrylic does not like point pressure. If a screw is tightened like it is going into metal, the acrylic can crack around the hole.
Improper mounting also creates stress. If a panel is forced into a frame, the pressure may stay there. The crack may appear days later.
Metal and acrylic combinations also need care. Metal expands and contracts differently from acrylic. If the design gives no space for movement, acrylic often becomes the weaker side.
| Assembly behavior | Why it causes risk | Better method |
|---|---|---|
| Over-tightened screws | Creates point pressure | Use washers and controlled torque |
| No rubber gasket | Hard contact damages acrylic | Add soft buffer |
| Forced fitting | Constant stress stays inside part | Adjust tolerance |
| Metal frame too tight | Acrylic cannot expand | Leave movement allowance |
| Strong adhesive everywhere | Rigid joint locks stress | Use suitable bonding method |
I have learned to be careful when a buyer says, “The part only cracked after assembly.”
That sentence does not close the case.
It opens the case.
The smart move is to compare unassembled parts, assembled parts, screw locations, hole distance, and crack direction. Cracks tell stories. They just do not speak loudly.
I once checked a set of acrylic parts that cracked around mounting holes. The buyer was upset because the cracks showed after installation. After checking photos, the holes were close to the edge, the screws had no washers, and the crack lines started exactly from the pressure points.
The part quality mattered, yes.
But the assembly method also mattered.
Small parts. Small screws. Big lesson.
That is why experienced buyers do not wait until the carton arrives to think about risk. They check the risk before the order.
How Can Buyers Identify High-Risk Acrylic Products Before Ordering?

Acrylic cracking prevention starts before production.
Not after the complaint.
A good buyer does not only ask for price, size, and lead time. A good buyer asks questions that reveal how the supplier thinks.
Because in custom acrylic work, the supplier’s thinking is part of the product.
The first thing I notice is how fast a supplier says “no problem.” If the part has sharp corners, thin walls, holes near edges, or chemical cleaning needs, and the supplier still says “no problem” without asking anything, I become more careful.
“No problem” can be a nice sentence.
It can also be a red flag.
Warning signs from suppliers
Some suppliers compete mainly on price. That is normal in the market.
But when the price is extremely low, something usually has to be removed.
Maybe better material is removed.
Maybe inspection time is removed.
Maybe annealing is removed.
Maybe packaging strength is removed.
The buyer may save money at the beginning, then pay more later through replacements.
| Warning sign | What it may mean | Buyer risk |
|---|---|---|
| Very low quotation | Lower material or skipped process | Cracking or inconsistency |
| No material grade discussion | Supplier treats all acrylic the same | Wrong sheet choice |
| No mention of annealing | Stress may stay in parts | Delayed cracks |
| No design feedback | Supplier only follows drawing | Hidden structural risk |
| No sample testing plan | Production risk is not checked early | Mass order surprise |
Another warning sign is when a supplier does not ask about the application.
Acrylic for a cosmetic counter display is not the same as acrylic for a load-bearing rack.
Acrylic for indoor retail use is not the same as acrylic used near heat or sunlight.
Acrylic for a simple flat panel is not the same as acrylic with many drilled holes and tight assembly.
If the supplier does not ask where and how the part will be used, the quote may be fast, but the risk is also fast.
Questions experienced buyers usually ask
Experienced buyers usually ask simple but sharp questions.
They are not trying to make the supplier uncomfortable. They are trying to understand the process.
Here are the questions I respect most.
| Buyer question | Why it matters | What a good answer should include |
|---|---|---|
| Is the acrylic cast or extruded? | Material behavior affects cracking risk | Clear material choice and reason |
| Was annealing performed after laser cutting? | Stress relief may be needed | Yes/no and when it is needed |
| What edge finishing method is used? | Polishing can add heat stress | Laser edge, flame polish, diamond polish, etc. |
| Can sharp corners be rounded? | Rounded corners reduce stress | Suggested radius |
| How close can holes be to the edge? | Hole location affects cracking | Safe distance recommendation |
| What cleaner should the end user avoid? | Chemicals can trigger cracking | Cleaning instruction |
These questions are not fancy.
But they separate careful suppliers from careless suppliers.
If a supplier answers only with “yes, good quality,” that answer is too thin.
A useful answer should explain the trade-off.
For example:
- Cast acrylic may cost more, but it may be safer for complex laser-cut parts.
- Annealing adds time, but it reduces stress risk.
- Rounded corners may slightly change the design look, but they improve durability.
- Thicker material may increase cost, but it may reduce replacement risk.
The best factory conversations are not always smooth. Sometimes we need to say, “This design is possible, but not ideal.”
That sentence protects both sides.
Prototype evaluation methods
A prototype is not only for checking size and appearance.
It should also test risk.
This is one mistake I see often. A buyer receives a beautiful sample, takes photos, checks the shape, and approves mass production.
But the sample never gets stressed.
Then the mass production parts enter real use, and problems appear.
A useful prototype check should include some simple tests.
| Test method | What it checks | What buyers should watch |
|---|---|---|
| Bend test | General flexibility | Whitening, edge marks, cracking |
| Pressure test | Strength under load | Cracks around corners or joints |
| Alcohol wipe test | Stress sensitivity | Fine cracks or crazing |
| Light inspection | Edge quality | Micro-cracks, burn marks |
| Screw assembly test | Mounting safety | Cracks around holes |
| Storage test | Delayed behavior | Changes after several days |
The alcohol wipe test needs care. It should not be used blindly on final products unless the application requires chemical resistance. But as a stress warning test, it can reveal hidden problems.
If cracks appear quickly after alcohol exposure, the part may already have stress.
This does not mean all acrylic should be cleaned with alcohol. In fact, I usually advise buyers to avoid alcohol cleaners on acrylic. But for testing, controlled exposure can be useful.
Prototype testing is like asking the part, “Are you really okay?”
Sometimes the part answers honestly.
Sometimes it only smiles for the camera.
That is why annealing deserves its own discussion. It is not a glamorous process. Nobody puts it on a product photo. But it can decide whether the product survives.
Why Annealing Matters More Than Many Buyers Realize
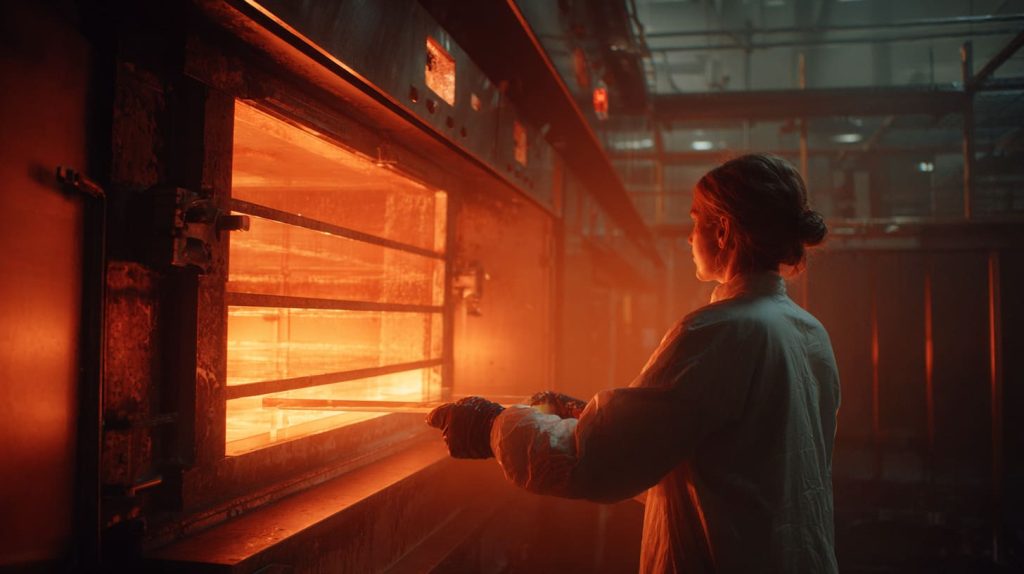
Annealing is not an exciting word.
It does not sound like design. It does not sound like branding. It does not make the product look more expensive in a photo.
But in many acrylic projects, annealing is the quiet worker behind long-term stability.
Annealing means heating acrylic in a controlled way and then cooling it slowly. The goal is to release internal stress.
If laser cutting creates stress, annealing gives the material a chance to relax.
The decision I make is usually based on risk, not habit. If the acrylic part is thick, complex, drilled, bonded, or used in a high-value project, I do not treat annealing as a small optional detail.
I treat it as insurance.
What annealing actually does
Acrylic can trap stress from production.
Laser cutting creates heat.
Drilling creates pressure.
Polishing creates friction.
Bonding creates chemical and structural stress.
Annealing helps reduce that stress before the part enters real use.
| Without annealing | With proper annealing |
|---|---|
| Stress may remain near edges | Stress is reduced |
| Cracks may appear after cleaning | Better chemical resistance behavior |
| Drilled holes may be more sensitive | Hole areas become more stable |
| Bonded parts may crack later | Bonded areas may last longer |
| Risk is hidden during inspection | Risk is lowered before shipment |
Annealing does not make acrylic unbreakable.
That is important.
It is not magic.
If the design is bad, the material is poor, or the assembly is too tight, annealing cannot save everything. But it can reduce one major risk: hidden stress.
For custom acrylic work, that matters a lot.
When annealing becomes critical
Not every acrylic part needs annealing.
For simple, low-risk parts, it may not be necessary.
But some projects deserve more caution.
| Product condition | Annealing importance | Why |
|---|---|---|
| Thick acrylic panels | High | More stress can stay inside |
| Complex laser-cut shapes | High | More corners and cut paths |
| Parts with drilled holes | High | Holes are crack starters |
| Bonded acrylic boxes | Medium to high | Adhesive areas carry stress |
| Load-bearing displays | High | Pressure continues during use |
| Simple flat signs | Low to medium | Depends on size and mounting |
A clear acrylic display block with no holes and no assembly may have lower risk.
A laser-cut acrylic bracket with slots, holes, screws, and load pressure has higher risk.
The shape matters.
The use matters.
The customer expectation matters.
If the buyer is selling the final product under their own brand, delayed cracking becomes a brand problem. That risk is much bigger than the cost of a process step.
Why some factories skip annealing
Factories skip annealing for simple reasons.
It takes time.
It uses electricity.
It needs space.
It adds handling work.
And many buyers do not ask for it.
So some factories remove it to keep price low and delivery fast.
| Reason annealing is skipped | Short-term benefit | Long-term risk |
|---|---|---|
| Save production time | Faster lead time | More delayed cracking |
| Reduce cost | Lower quotation | Higher replacement cost |
| Limited equipment | Easier workflow | Lower process control |
| Buyer did not request it | No discussion needed | Hidden quality gap |
| Product looks fine | Easy approval | Later failure |
I do not think every skipped annealing process means the factory is dishonest.
Sometimes the product simply does not need it.
But when a high-risk product needs stress control and nobody discusses it, that becomes a problem.
For buyers, the smart question is not “Do you always anneal?”
The better question is:
“For this design, do you recommend annealing? Why or why not?”
That question forces real thinking.
And real thinking is what prevents real trouble.
Once stress is controlled, design becomes the next big thing. A good process can help a weak design, but it cannot fully protect it forever.
How Design Decisions Can Prevent Future Cracking
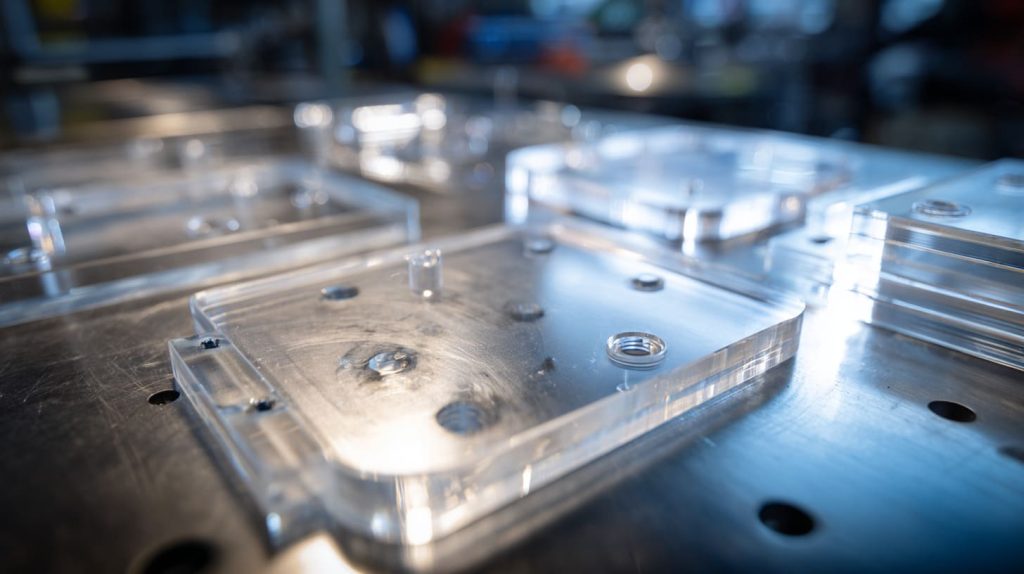
Acrylic cracking is not only a factory problem.
Sometimes the drawing already carries the crack inside it.
That may sound harsh, but I have seen it too often. The design looks clean. The dimensions are correct. The product photo looks good. But the part is not friendly to acrylic.
Acrylic needs curves, space, and smart pressure control.
It does not like sharp stress points.
It does not like being forced.
It does not like metal-style thinking.
When I review an acrylic drawing, I do not only ask, “Can we make this?” I also ask, “Will this still be okay after shipping, assembly, cleaning, and use?”
That second question is where many cracks are prevented.
Better corner and hole design
Sharp inside corners are one of the easiest problems to fix.
A small radius can make a big difference.
In many designs, the buyer wants a square internal corner because it looks precise. But acrylic does not care about visual neatness as much as stress flow.
A rounded corner spreads stress.
A sharp corner collects stress.
| Design choice | Risk | Better option |
|---|---|---|
| Sharp inside corner | Crack starts at corner | Add radius |
| Hole close to edge | Edge may split | Move hole inward |
| Small hole with tight screw | High pressure | Use larger clearance hole |
| No washer | Screw head presses directly | Add washer or gasket |
| Thin bridge between cuts | Weak section | Increase material width |
For drilled holes, safe distance is very important.
There is no single rule for every project because thickness, screw size, load, and material type all matter. But as a general habit, I do not like holes sitting too close to the edge.
A hole near the edge is like a door too close to a wall corner. It may work, but the structure has less room to handle force.
Choosing proper acrylic thickness
Thin acrylic looks elegant.
It also saves cost.
But thin acrylic can be risky when the part has to carry load, hold screws, stand upright, or survive shipping pressure.
The challenge is balance.
A buyer may want a slim look. A designer may want a light product. A purchasing team may want a lower unit price. But the final product still needs to survive.
| Acrylic thickness decision | Benefit | Risk |
|---|---|---|
| Very thin sheet | Lower cost and lighter weight | Easier to bend or crack |
| Medium thickness | Better balance | May need design support |
| Thick sheet | Stronger and premium feel | Higher cost and longer processing |
| Wrong thickness for load | Lower initial price | More failure risk |
| Thickness matched to structure | Stable performance | Better long-term value |
I often tell buyers that thickness is not only a number.
Thickness is a promise.
If the product is a small protective cover, thinner material may be fine.
If the product is a display stand carrying cosmetics, electronics, or samples in a store, the thickness must match real use.
The customer will not blame the spreadsheet if the display cracks.
They will blame the product.
Using the right joining methods
Joining acrylic is not just “glue it” or “screw it.”
The joining method decides how stress moves through the product.
Rigid bonding can look clean but may trap stress. Screws can be strong but may create point pressure. Slots can help alignment but may become crack points if too tight.
| Joining method | Good side | Risk side |
|---|---|---|
| Solvent bonding | Clean and clear joint | Can create chemical stress |
| UV bonding | Nice visual finish | Needs process control |
| Screws | Easy assembly and repair | Over-tightening cracks acrylic |
| Slots and tabs | Accurate positioning | Tight fit creates stress |
| Metal brackets | Strong support | Expansion mismatch |
A flexible mounting structure often performs better than a beautiful but rigid one.
For example, a screw with a washer and a small clearance hole may look less “perfect” than a tight hidden fixing point. But it may survive better.
This is the kind of trade-off that does not show up in a product rendering.
It shows up after two months of real use.
I like designs that give acrylic a little breathing room.
Not too loose.
Not careless.
Just enough space so the material is not fighting every day.
A smart design reduces pressure before production even starts. A smart factory then uses process control to keep that design safe through cutting, finishing, packing, and shipping.
How Professional Acrylic Factories Reduce Cracking Risks

A professional acrylic factory does not only make parts.
It controls risk.
That may sound less exciting than “custom design” or “fast lead time,” but it is the real work behind stable B2B orders.
In our factory work, I care a lot about repeatability. One perfect sample means very little if the mass production batch is unstable. A buyer does not need one lucky piece. A buyer needs 500 or 5,000 pieces that behave the same way.
The part I never ignore is batch consistency. If the first 20 pieces look good but the last 200 pieces come from different sheet quality or different cutting settings, the order is not truly under control.
Material sourcing standards
Good acrylic products start with good sheets.
This sounds obvious, but it is where many problems begin.
If the sheet quality changes from batch to batch, the final product becomes unpredictable. Laser settings that worked yesterday may not work the same today.
A stable material supplier matters.
| Material control point | Why it matters | Factory action |
|---|---|---|
| Sheet grade | Affects strength and cutting | Use suitable cast or extruded acrylic |
| Thickness tolerance | Affects assembly fit | Check sheet thickness |
| Surface quality | Affects final appearance | Inspect scratches and defects |
| Internal clarity | Affects display quality | Check transparency |
| Batch consistency | Affects mass production | Keep stable sourcing |
For display products, buyers often care about transparency, edge finish, and clean appearance.
But I also care about how the sheet behaves during machining.
Some acrylic looks good before production but reacts poorly during laser cutting or drilling. That is why material inspection should not stop at the surface.
Production process control
Laser cutting needs control.
Not every acrylic part should use the same settings. Thickness, material type, shape complexity, and edge quality requirements all affect the laser setup.
If the laser power is too high, the edge may look smooth but carry stress. If the speed is wrong, the edge may burn or become brittle. If the parts are not cooled or handled properly, stress can increase.
| Process step | Risk if poorly controlled | Better control method |
|---|---|---|
| Laser cutting | Heat stress | Adjust power and speed |
| Drilling | Cracks around holes | Use proper drill and pressure |
| Polishing | Heat marks or crazing | Control heat and friction |
| Bonding | Glue-line cracking | Use suitable adhesive and curing |
| Inspection | Hidden risk missed | Check stress areas before packing |
Stress-relief inspection matters before shipment.
This does not always mean every part goes through a heavy test. It means the factory should know where cracks are likely to start and check those areas.
For example:
- Inside corners
- Laser-cut slots
- Drilled holes
- Bonded edges
- Thin bridges
- Screw mounting areas
These places deserve more attention than a random flat surface.
Acrylic usually tells you where it is weak.
You just need to look before the buyer finds out.
Packaging and shipping protection
Packaging is not just about preventing scratches.
It also prevents pressure.
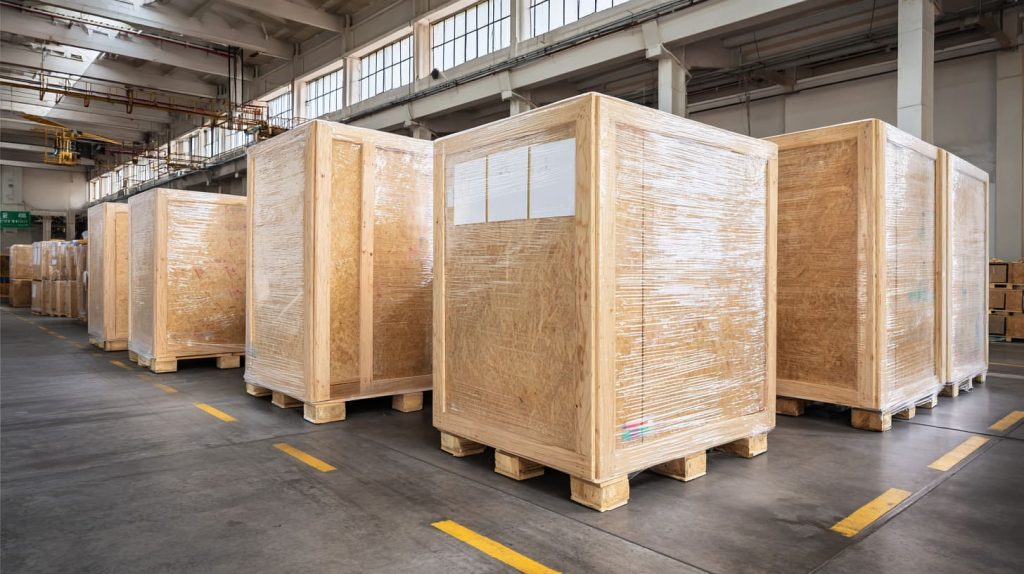
Acrylic products can crack during shipping if the packaging pushes too hard in the wrong place. Flat panels can warp. Corners can take pressure. Parts can rub against each other. Heavy cartons can compress lower boxes.
Good packaging should protect both the surface and the structure.
| Packaging risk | Possible damage | Better protection |
|---|---|---|
| Parts packed too tightly | Constant pressure | Add spacing and soft material |
| Corners not protected | Edge cracks | Use corner guards |
| Panels stacked badly | Warping or stress | Keep flat support |
| No anti-vibration layer | Micro damage | Add foam or separators |
| Moisture exposure | Surface or packaging issues | Use dry, clean packing |
Temperature-aware packaging also matters for some shipments.
Acrylic can travel through hot containers, cold warehouses, and dry indoor storage. Packaging cannot control the whole world, but it can reduce sudden pressure and vibration.
For export orders, this is important.
A good package does not only survive shipping.
It helps the part arrive without carrying new stress.
Still, even with good factory control, problems can happen. The real test of a supplier is not whether they claim perfection. It is how they help investigate when something goes wrong.
What Buyers Should Do If Cracks Appear After Delivery
When cracks appear after delivery, emotions rise quickly.
The buyer feels pressure from their customer.
The factory worries about responsibility.
The sales team wants to calm things down.
The production team wants photos.
Everyone wants an answer.
But if we rush to blame, we may miss the real cause.
The most useful mindset is simple: treat cracks as evidence.
Not as an argument.
The best move I make in this situation is to slow the conversation down and collect facts first. A fast promise may feel polite, but a wrong conclusion can make the next batch fail again.
How to investigate the root cause
Crack patterns are important.
A crack around a screw hole tells a different story from a crack along a laser edge. A crack near a glue line tells a different story from a crack on a flat surface.
The location, direction, and timing all matter.
| Crack pattern | Possible cause | What to check |
|---|---|---|
| Crack from hole outward | Screw pressure or hole too close to edge | Assembly method and hole design |
| Crack along laser edge | Heat stress or material issue | Cutting settings and edge quality |
| Fine surface crazing | Chemical exposure | Cleaner or solvent contact |
| Crack near glue line | Adhesive stress | Bonding method and curing |
| Corner crack | Stress concentration | Corner radius and packaging pressure |
| Random internal crack | Material inconsistency | Sheet batch and impact history |
I usually ask for photos from different angles.
One close-up photo is helpful, but it is not enough.
A good photo set should show:
- The full product
- The cracked area close-up
- The back side
- The assembly condition
- The screw or mounting area
- The packaging condition
- Other pieces from the same batch
Photos do not solve everything, but they stop the conversation from becoming pure guessing.
Important evidence to collect
Evidence should be practical.
Nobody needs a legal-style investigation for every small part. But buyers and suppliers both need enough information to understand the failure.
| Evidence | Why it helps |
|---|---|
| Photos of crack locations | Shows where stress started |
| Packaging photos | Checks shipping pressure |
| Carton damage photos | Shows transport impact |
| Assembly videos or notes | Checks screw pressure and fitting |
| Cleaning method | Finds chemical exposure |
| Warehouse condition | Checks temperature and stacking |
| Batch comparison | Shows whether issue is isolated or general |
Batch comparison is very useful.
If only assembled pieces cracked, assembly may be a major factor.
If unassembled pieces also cracked, production or material stress may be more likely.
If only one carton had cracks, packaging or transport pressure may be involved.
If cracks appear in the same location across many pieces, design or process is probably involved.
This is not about protecting the factory.
It is about finding the truth.
A wrong answer is expensive.
A correct answer is useful, even if it is uncomfortable.
How experienced buyers handle supplier communication
Good buyers do not only ask for replacement.
They ask for corrective action.
Replacement fixes the current pain.
Corrective action prevents the next pain.
A useful supplier communication may include:
- What happened?
- How many pieces were affected?
- Where did the cracks appear?
- What is the likely root cause?
- What will change in material, process, design, or packing?
- How will the next batch be checked?
- Should the drawing be adjusted?
| Buyer request | Why it matters |
|---|---|
| Root cause analysis | Avoids guessing |
| Corrective action report | Creates process accountability |
| Revised drawing suggestion | Fixes design risk |
| Material confirmation | Checks sheet suitability |
| Process change proof | Shows real improvement |
| Packing update | Reduces shipping pressure |
| Sample retest | Confirms the fix before mass order |
The tone also matters.
If the buyer only sends angry messages, the factory may become defensive.
If the factory only says “not our problem,” the buyer loses trust.
The best result usually comes from a serious but calm discussion.
I prefer this kind of message:
“We need to understand why cracks appeared after delivery. Please help check the crack location, material batch, cutting process, annealing condition, and packing method. We also want your suggestion to avoid this in the next production.”
That message is firm.
But it leaves room for solving the problem.
And solving the problem is the point.
Because in B2B custom acrylic work, the goal is not to win one argument. The goal is to build a product that does not create the same argument again.
Conclusion
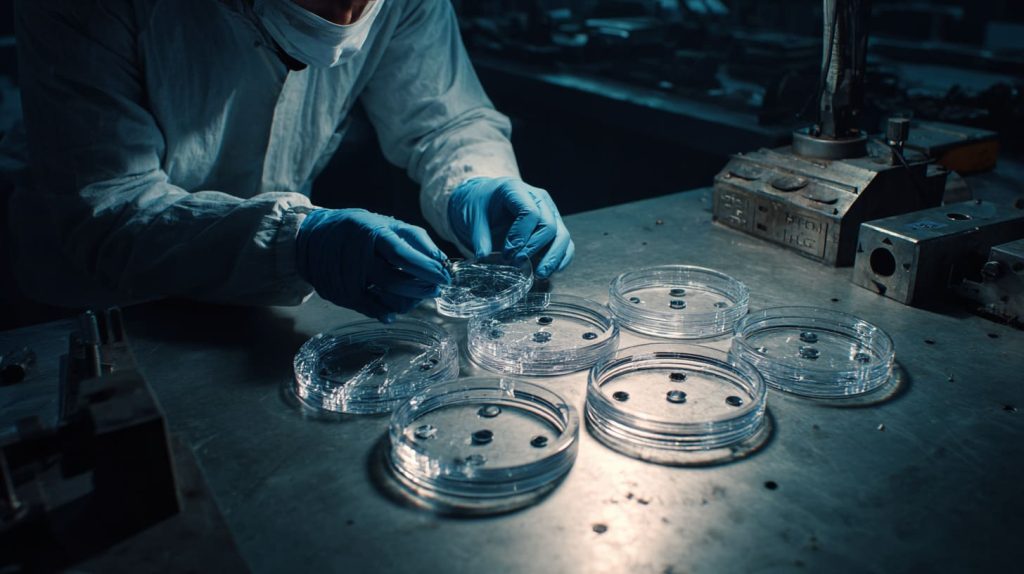
Laser-cut acrylic cracking weeks after shipment is rarely a simple story.
It is easy to blame shipping because shipping is visible. The carton moved. The parts traveled. The timeline feels obvious.
But my experience tells me to look deeper.
A delayed crack often starts before the product leaves the factory. It may start from heat stress during laser cutting. It may start from poor material choice. It may start from sharp inside corners, holes too close to the edge, tight assembly, chemical cleaning, or skipped stress relief.
Sometimes the root cause is one big mistake.
More often, it is several small mistakes standing in a line.
This is why I do not judge acrylic quality only by the first appearance. A beautiful sample matters, yes. A clean edge matters. A transparent surface matters.
But long-term stability matters more.
I think this way because custom acrylic products are not made for a photo. They are made for real use. They may be cleaned by workers, assembled by another team, packed into a retail display, placed under lights, shipped again, or used by a brand owner who expects everything to look perfect.
That real life is harder than a sample table.
So my view is simple:
- A good acrylic product needs suitable material.
- A good acrylic product needs controlled cutting.
- A good acrylic product needs smart design.
- A good acrylic product needs careful assembly thinking.
- A good acrylic product needs packaging that protects more than the surface.
- A good acrylic product needs honest communication between buyer and factory.
For buyers, the best protection is not only asking for the lowest price.
The best protection is asking better questions before production starts.
Ask about cast or extruded acrylic.
Ask about laser settings and edge quality.
Ask whether annealing is needed.
Ask about hole distance, corner radius, assembly pressure, and cleaning limits.
Ask for prototype testing when the design carries risk.
These questions may feel small at the beginning.
But they can save a full project later.
At Feilong Acrylic, this is also why we prefer custom-order communication instead of pushing a ready-made catalog. A custom acrylic product is not only a shape. It is a chain of decisions. If one decision is weak, the finished part may look fine today and fail tomorrow.
If you are planning a custom acrylic display, box, frame, stand, rack, or special acrylic component, do not wait until cracks appear to talk about stress.
Send the drawing.
Share the use condition.
Tell us how the part will be assembled, cleaned, packed, and used.
Then we can review the details together and help you reduce the cracking risk before production begins.




